AD User group membership not propagating into site collections

AD User group membership propagation issue

In some rare instances, users may exist within a Site Collection that don’t receive their AD group membership updates.

I’ve traced this down to recreated AD users that have the same account name, yet a new SID. The solution is to wipe the user references from the site collection.

Be forewarned, any user permissions will be wiped as well. One more excellent reason to only use AD groups for assigning permissions in SharePoint!

You can see this internal list and even delete the user by adapting this URL:
http ://WebApp/ManagedPath/namedSiteCollection/_layouts/people.aspx?MembershipGroupId=0

Better to do it in PowerShell for speed, extensibility, consistency, and across many site collections. The trick comes down to a specific way to eliminate the user from the site collection:

1
$RootWeb.SiteUsers.Remove($MyUser)

Note trying $RootWeb.Users.Remove($MyUser) or $RootWeb.AllUsers.Remove($MyUser) will not work.

To finish it off, I prefer to re-add the user:

1
$RootWeb.EnsureUser($MyUser)

Here’s the full script, where I traverse through site collections in a Web App, filter them based on criteria (in this case the managed path), then carefully take the action on a list of users (one or more, comma separated), and output any failures along the way:

  Start-SPAssignment –Global
$UsersToWipe = "DOMAINPoorBloke"
$UsersToWipeArray = $UsersToWipe.Split(,)
 
$siteUrl = "http ://SharePoint" 
 
Write-Host "script starting $(get-date)"
 
$rootSite = New-Object Microsoft.SharePoint.SPSite($siteUrl)
$spWebApp = $rootSite.WebApplication 
foreach($site in $spWebApp.Sites)
{
 
 
 if ($site.Url -notlike "$siteurl/SpecificPath/*") 
 {
     Write-Host "Fast Skipping $($site.Url)"
 }
 else
  { 
   $rootWeb = $site.RootWeb;
 
   foreach ($MyUser in $UsersToWipeArray)
   {
        try
        {
            try
            {
                $user1 = $RootWeb.EnsureUser($MyUser)
            }
            catch
            {
                Write-Host "x1: Failed to ensure user $($MyUser) in $($Site.url)"
            }
 
            try
            {
                $RootWeb.SiteUsers.Remove($MyUser)
                $RootWeb.update()
            }
            catch
            {
                Write-Host "x2: Failed to remove $($MyUser) from all users in $($Site.url)"
            }
 
            try
            {
                $user1 = $RootWeb.EnsureUser($MyUser)
            }
            catch
            {
                Write-Host "x3: Failed to ensure user $($MyUser) in $($Site.url)"
            }
 
       }
       catch
       {
            Write-Host "x4: other failure for $($MyUser) in $($Site.url)"
       }
   }
 } #Site to process 
   
    $site.Dispose();  
 } #foreach Site
 
 
Write-Host "script finishing $(get-date)"
 
 
Stop-SPAssignment –Global

Wiping Taxonomy Values

Wiping MMS Taxonomy Values

Ever want to wipe out Taxonomy values in a Managed Metadata field in a library? Assigning a null won’t cut it. My good friend Brett Parker found the solution:

for ($i=0; $i -lt $count; $i++)
{
      $doc = $items[$i]
      $field = [Microsoft.SharePoint.Taxonomy.TaxonomyField]$lib.Fields[$CompanyMyGroup]
      $empty = New-Object Microsoft.SharePoint.Taxonomy.TaxonomyFieldValue($field)
      $field.SetFieldValue($doc, $empty)
      $doc.SystemUpdate()}

Search Crawling in SP2013

Search Crawling in SP2013

In SP2010, we have two types of crawls; Full or Incremental Crawl. In a nutshell, your search index can be made on-average fresher, but it is not real-time. Right now we do Full Crawls weekly and incremental crawls hourly.

One of the limitations of Full and Incremental Crawls in SP2010 is that they cannot run in parallel, i.e. if a full or incremental crawl is in progress, the admin cannot kick-off another crawl on that content source. This forces a first-in-first-out approach to how items are indexed.

Moreover, some types of changes result in extended run times; such as script based permission changes, or moving a folder, or changing fields in a content type.

Incremental crawls don’t remove “deletes”, so ghost documents are still returned as hits, after deletion, until the next full crawl.

SharePoint 2013 will introduce the concept of “Continuous Crawl”. It doesn’t need scheduling. The underlying architecture is designed to ensure consistent freshness by running in parallel.

Right now, if a Full or Incremental crawl is slow, everything else awaits its completion.

It’s a sequential crawl. Behind the scenes, continuous crawl selection results in the kick-off of a crawl every 15minutes (this wait can be configured) regardless of whether the prior session has completed or not.

This means a change that is made immediately after a deep and wide-ranging change doesn’t need to ‘wait’ behind it.

New changes will continue to be processed in parallel as a deep policy change is being worked on by another continuous crawl session.

Note that Continuous crawl will increase load incrementally on the SharePoint server since it inherently can run parallel multiple sessions simultaneously.

If needed, we can tune this through ‘Crawl Impact Rule’ settings (which exist today in SP2010), which control the maximum number of simultaneous requests that can be made to a host (default is 12 threads, but it is configurable).

When users can’t access a taxonomy

When users cannot access a MMS taxonomy

The Managed Metadata Service is great; but what do you do when users can’t view some taxonomy entries? This occurs when the user does not have access to the HiddenTaxonomyList, native to each Site Collection.

You can view the list using SharePoint Manager from CodePlex, navigating the Object Model, or simply by modifying this URL to reflect your site collection URL:
http ://SharePoint/sites/SiteCollection/Lists/TaxonomyHiddenList/AllItems.aspx where “http ://SharePoint/sites/SiteCollection” is replaced with your site collection URL.

I recently found a situation where permissions by default were empty. Best would be to allocate all Authenticated users access. However what does one do if there are many site collections within a given Web Application? Here’s a script that will iterate through Site Collections, and grant the access:

 $WebApp = "http ://SharePoint" #replace with your own web app
$webapp = get-spwebapplication $webapp
 
function AddPerm ([Microsoft.SharePoint.SPList] $TargetObj, [string] $RoleValue, [string] $RoleGroup)
{ #SPWeb is implied and not passed as parms for efficiency!
    if ((!$RoleValue) -or (!$RoleGroup))
    {
    return; #race to be efficient on NullOp
    }
    try
    {
                $user = $SPWeb.ensureuser($RoleGroup)
                $roledef = $SPWeb.RoleDefinitions[$RoleValue]
                $roleass = New-Object Microsoft.SharePoint.SPRoleAssignment($user)
                $roleass.RoleDefinitionBindings.Add($roledef)
 
                $TargetObj.RoleAssignments.Add($roleass)  
    }
    catch
    {
    Write-Host -ForegroundColor DarkRed "ERR: Can't Assign $($RoleGroup)"
    }
}
 
for ($i=0; $i -lt $WebApp.Sites.Count; $i++)
{
    $site=$webapp.Sites[$i];
    $SPWeb=$site.rootweb;
    $list = $SPWeb.Lists["TaxonomyHiddenList"]
    addPerm $list "Read" "SharePoint NT Authenticated Users"
}

Send Email From PowerShell

Sending An Email from PowerShell

It’s easy to send an email from PowerShell, and it’s really useful for notifying yourself of the completion of a long-running script.

It’s also a way to document what ran when, if you are like me and running hundreds of scripts and need a way to organize documentation on when you run things.

Just alter the parameters below, and let ‘er rip and spam yourself!

   param(  
        [string] $From = "server@joelDomain.com",
        [string] $To = "joelplaut@joelDomain.com",
        [string] $Title = "title",
        [string] $Body = "body"
    )
    $SmtpClient = New-Object System.Net.Mail.SmtpClient
    $SmtpServer = "mail.domainserver.com"
    $SmtpClient.host = $SmtpServer
    $SmtpClient.Send($From,$To,$Title,$Body)

Output User Profile Service Colleagues

Output User Profile Service Colleagues

SharePoint User Profile Service maintains the set of colleagues associated with each user registered within the User Profile Service. This is used for a range of social features, and is leveraged by third party products for managing relationships between users. The colleagues are initially defined based on the users with whom a user shares a direct reporting line. Users can then add or remove colleagues.

Below is a PowerShell script to output the set of colleagues for a given user, both into XML and also into a text file in list format.

  ##This script gets the colleagues for the specified user using the UPS web service , outputting to both XML and txt as a list
$uri="http://mysites.FQDN.com/_vti_bin/UserProfileService.asmx?wsdl"
## $accountName is a string that contains the account name for which you need to get all the colleagues
#$Acct="JPlaut"
$accountName="Domain$($Acct)"
$OutputDir="C:UsersSharePoint ConsultantDocumentsPowerShellUPSReports"
 
$userProfileWebServiceReference = New-WebServiceProxy -Uri $uri -UseDefaultCredential
$colleagues=$userProfileWebServiceReference.GetUserColleagues($accountName) 
## Creates an GetUserColleagues.xml file in the D: which contains colleague information for the specified $accountName
$output = New-Object -TypeName System.IO.StreamWriter -ArgumentList "$($OutputDir)GetUserColleagues$($Acct).xml", $false
$output.WriteLine("<!--?xml version=""1.0"" encoding=""utf-8"" ?-->")
$output.WriteLine("")
foreach($colleague in $colleagues)
{
    $accountName=$colleague.AccountName
    $privacy=$colleague.Privacy
    $name=$colleague.Name
    $isInWorkGroup=$colleague.IsInWorkGroup
    $group=$colleague.Group
    $email=$colleague.Email
    $title=$colleague.Title
    $url=$colleague.Url
    $userProfileId=$colleague.UserProfileId
    $id=$colleague.Id
$output.WriteLine("")
    $output.WriteLine("") 
} 
$output.WriteLine("") 
$output.WriteLine() 
$output.Dispose()
 
$colleagues &gt; "$($OutputDir)GetUserColleagues$($Acct).txt"

As an added bonus, here’s a command to remove a specific Colleague from a user

 $userProfileWebServiceReference.RemoveColleague("Domainuser","domaincolleague")

While SharePoint does a good job of guessing colleagues based on the AD reporting structure, it doesn’t do a great job of keeping them up to date. Colleagues can get out of date. As the AD reporting structure changes, Colleagues can remain, which can cause issues. If you want to reboot colleagues for a user, here’s how:

   $userProfileWebServiceReference.RemoveAllColleagues("domain\victim")

Extending the Outlook Ribbon programmatically

Extending the Outlook Ribbon

The MS-Office ribbon can be extended programmatically. In this article, I add a new tab to the ribbon, and new icons that open links to sites, then create a ClickOnce deployable package. We’ll explore a few tricks including how to import new icons. For a great overview of the Fluent UI, please see: https://msdn.microsoft.com/en-us/library/aa338198.aspx

Ribbon XML

Microsoft designed the Fluent UI (aka Ribbon) to be extensible. The easiest way to do this is via the Ribbon Designer. However I chose to hand-craft the solution based on Ribbon XML. After creating a new Visual Studio 2010 project, ensuring use of .NET 4.0,

To use an existing MS-Office Tab, just reference it by name, using tab idMso:

However you can create your own tab. Just remember to give it a unique ID, and also add the label. Note the use of “id” rather than “idMso”:


 <!-- Ribbon XML -->


 <button></button>
 <button></button>
 <button></button>
 <button></button>
 <button></button>


 <button></button>
 <button></button>
 <!--?xml version="1.0" encoding="UTF-8" standalone="yes"?-->
 
 
      <command></command>
      <command></command>


         <button></button>
         <button></button>
         <button></button>

For your image, you can reference existing MS-Office images, which is easiest and faimilar to users. Note that tag “imageMso” is used. The other advantage, as we’ll soon see, is these images are already sized, and loaded correctly:

 imageMso="RecordsAddFromOutlook"

MS-Office has a great set of familiar icons you can leverage. These are easier to use than importing your own (which we will get to shortly). To select from existing icons, check out this great site, which includes the XML to reference the MS-Office images.

To load your own images, first import the desired images into the Visual Studio project; under Resources is a great place. I recommend right clicking and marking each to “Include”. These images will only ever appear if you explicitly binary stream them in on Ribbon load. Here’s how. At the start of the MyRibbonxml, add a mew reference method called “GetImage” to load the images you will reference in this MyRibbon.xml:

 imageMso="RecordsAddFromOutlook"

Rather than using imageMso, just use an image tag:

image="DMFLogo.ico"

Now for every image you reference, the loadImage method will be called, passing in the name of the image as a parameter. Let’s now add the getImage method to the myRibbon.cs:

   public Bitmap GetImage(string imageName)
        {
            Assembly assembly = Assembly.GetExecutingAssembly();
 
            //this is useful for navigating to discover the actual resource name reference
            //string[] x;
            //x = assembly.GetManifestResourceNames();
 
            Stream stream = assembly.GetManifestResourceStream("MyProjectName.Resources." + imageName);
 
            return new Bitmap(stream);  //uses system.drawing, added for now
        }

At runtime, the stream is loaded based on the manifest reference. During initial debugging, it’s great to be able to see the manifest to ensure the path is correct. I’ve found it best to have a few lines of code to give you a handle on the manifest during debugging, if ever you need, just uncomment these and examine at a breakpoint:

   //string[] x;
//x = assembly.GetManifestResourceNames();

As the images are stored in a folder, you’ll have to get the project name reference and the “Resources” folder path correct.

One last point is I found ICO files don’t give the best resolution. Microsoft recommends PNGs, which is a good image format to start.

To open a browser as a ribbon action, adapt this function:

public void ActionOpenInsureds(Office.IRibbonControl control)
       {
           string targetURL = "http ://SharePoint/sites/MySite/SitePages/Index1.aspx";
           System.Diagnostics.Process.Start(targetURL);
           return;
       }

This function is called based on the button onAction tag in myRibbon.xml:

 onAction="ActionOpenInsureds"

For completeness, here’s the full sample myRibbon.xml:

  <!--?xml version="1.0" encoding="UTF-8"?-->
 
          <button id="textButton"></button>
 
          <button id="DMFButton"></button>
 
           <button id="tableButton"></button>

ClickOnce

ClickOnce is a fabulous technology. Previously we had to build a deployment project, or purchase 3rd-party software. This ribbon can be published to a central location as a ClickOnce install. It will appear in the Control Panel, and it can check in itself for updates. Here’s a great overview of ClickOnce: https://msdn.microsoft.com/en-us/library/t71a733d

To get started, simply select “Build, Publish” in Visual Studio 2010 and follow the menus.

A few things to note:
1. Unless you sign your code with a digital certificate, users will get prompted
2. The cert you use needs to have “code signing” authority, best is to get one issued by the CA (Certificate Authority) in your organization
3. If you set pre-requisites, the user needs admin authority on their machine in order to check-pre-requisites
4. There’s a registry change to control the .NET install prompts
5. Click-once does not support install for “All users” on the machine, only the current user
6. Even trying to run in silent mode still results in a single-acknowledgement window after the install

Silence is golden

I would expect running off My Documents would end up in the MyComputer Zone, which should be “Enabled” as a trusted zone for install without prompt, but here’s the keys to experiment with:

HKLMSoftwareMicrosoft.NETFrameworkSecurityTrustManagerPromptingLevel.

Then add the following string values for one or more of the security zones, as appropriate:

  • MyComputer
  • LocalIntranet
  • Internet
  • TrustedSites
  • UntrustedSites

Set the value of each security zone to one of the following:Enabled. The installation prompts the user if the solution is not signed with a trusted certificate. This is the default for the MyComputer, LocalIntranet, and TrustedSites zones.AuthenticodeRequired. The user cannot install the solution if it is not signed with a trusted root authority certificate. The installation prompts the user if the solution is not signed with a trusted publisher certificate. This is the default for the Internet zone.Disabled. The user cannot install the solution if it is not signed with a trusted publisher certificate. This is the default for the UntrustedSites zone.

The last option is to add this solution to the inclusion list, which is a list of trusted solutions.

Output Site Collection and storage information

Reporting on Site Collection and storage information

Wouldn’t it be nice to have a single report of Site Collections, the Content Database each is in, and the size in GB? Well, let’s do it!

First let’s grab the Web Application:

   get-spwebapplication http ://SharePoint 
 
Then we grab the Site Collections (all of them):
[sourcecode language="powershell"]
Get-SPSite -Limit all

Now, let’s select the information we want to see in the report:

select url,contentdatabase
 select url,contentdatabase,@{label="Size in GB";Expression={$_.usage.storage/1GB}}

Now, let’s output the report to a CSV file, making it easy to read in Excel:

  convertto-csv | set-content "L:PowerShellDBsize.csv"

Now let’s put it all together in a single command, piping the commands to produce the report:

 get-spwebapplication http ://SharePoint | Get-SPSite -Limit all | select url,contentdatabase,@{label="Size in GB";Expression={$_.usage.storage/1GB}} | convertto-csv | set-content "L:PowerShellDBsize.csv"

Copy files in folders from a Document Library to disk

Copy SharePoint files in folders to disk

A common request is extracting all the files within folders in a document library. The simple script below allows one to specify a source folder, library, web, and output location. The $TargetRootFolder can be found as a URL parameter in the URL when viewing the target folder for migrating. The script preserves the full URL structure including all folders and subfolders. Recursion makes this clean and simple.

 $webUrl = "http ://SharePoint/sites/MyWeb"
$TargetLib="MyLibrary"
$destination = "L:OutputLocation"
#derived right from the URL when viewing the folder, this works:
$TargetRootFolder="%2MyWeb%2SubFolder"
 
$web = Get-SPWeb -Identity $webUrl
 
function ProcessFolder 
{
    param($folderUrl)    
    $folder = $web.GetFolder($folderUrl)    
    if (!$Folder.exists)
    {
        Write-Host -ForegroundColor DarkRed "Whoops, folder at source does not exist, please recheck"
    }
    else
    {
 
    $destinationfolder = $destination + "/" + $folder.Url
 
    if (!(Test-Path -path $destinationfolder))         
    {             
        $dest = New-Item $destinationfolder -type directory          
    }   
 
    foreach ($file in $folder.Files) 
    {
    $binary = $file.OpenBinary()         
    $stream = New-Object System.IO.FileStream($destinationfolder + "/" + $file.Name), Create         
    $writer = New-Object System.IO.BinaryWriter($stream)         
    $writer.write($binary)         
    $writer.Close()  
    Write-Host "+" -NoNewline
    }
        foreach ($sf in $folder.SubFolders)
        {
            ProcessFolder($sf.url)  #Not quite Ackerman's function, this is first order recursion
        }   
    }
}
ProcessFolder($TargetRootFolder)

Now, if you need to ensure no documents ever overwrite, such as if you rename on the fly, here’s a bit of code that will cycle through optional filenames until one is found that does not exist.

 $inc=$null;
while (test-path $OutFileName)
{
$JPname="$($JPTitle)DUP$($inc)$($JPName.Substring($JPName.lastindexof(".")))"
$OutFileName=$destinationfolder + "/" + $inc+$JPName
$Inc++;
Write-Host "!" -NoNewline -ForegroundColor DarkRed
}

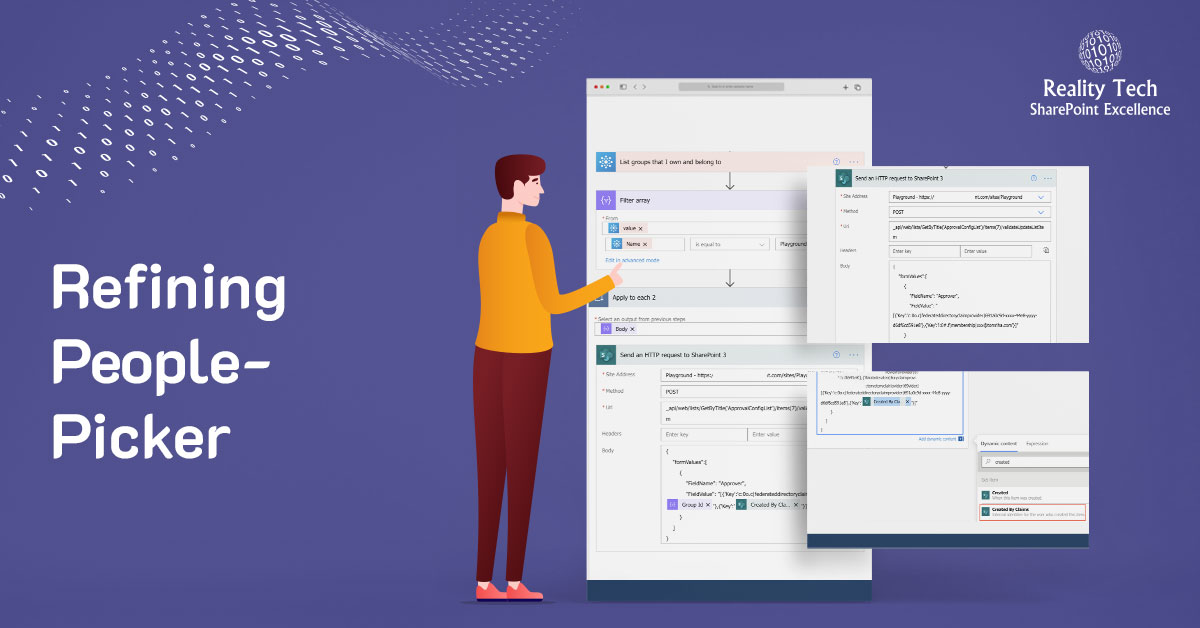
Refining People-Picker

Refining The SharePoint People-Picker

In SharePoint there are several locations where a set of users is presented in what is known as the “People-Picker”. Examples include a “people” field in lists, and in assigning security.

One can manage the set of users and groups presented, however THe underlying mechanism is not well known in the SharePoint community.

In short, it is the set of all users returned from AD (ActiveDirectory) plus the set of local users in the Site Collection being used.

In this article, I’ll provide guidance on how to adjust both the users returned from AD, as well as the users in the site collection.

AD Filtering

To return a subset of AD results, the following stsadm command is used:

 stsadm -o setproperty -url http ://SharePoint/  -pn peoplepicker-searchadcustomfilter -pv ""

In this example, http ://SharePoint is your web application, and the “” is the LDAP query. This clears the AD filter, as the LDAP query is empty. Note there is no PowerShell equivalent in SP2010, and this applies to a Web Application and not individual site collections. To test the change, try editing the set of Site Collection Administrators or User Policy for the Web Application in Central Administration.

In the example below, an LDAP query is specified to select AD entries where users have a manager (which filters out all kinds of non-standard user accounts), and groups starting with “SharePoint”.

   stsadm -o setproperty -url http ://SharePoint  -pn peoplepicker-searchadcustomfilter -pv "(|(&amp;(objectcategory=group)( sAMAccountName=domainSharePoint_*))(&amp;(&amp;(objectcategory=person)(objectclass=user))(manager=*)))"

Let’s check out the LDAP Query string above, with this bit of PowerShell:

$strFilter = "(|(&amp;(objectcategory=group)( sAMAccountName=yourdomainSharePoint _*))(&amp;(&amp;(objectcategory=person)(objectclass=user))(manager=*)))"
$objDomain = New-Object System.DirectoryServices.DirectoryEntry
 
$objSearcher = New-Object System.DirectoryServices.DirectorySearcher
$objSearcher.SearchRoot = $objDomain
$objSearcher.PageSize = 1000
$objSearcher.Filter = $strFilter
$objSearcher.SearchScope = "Subtree"
 
$colProplist = "name"
foreach ($i in $colPropList){$objSearcher.PropertiesToLoad.Add($i)}
 
$colResults = $objSearcher.FindAll()
 
foreach ($objResult in $colResults)
    {$objItem = $objResult.Properties; $objItem.name}

ColResults now has a nice array of results to work with.

While the above is all straightforward, the results in PeoplePicker could be less than perfect. If you test, the users returned may contain additional users, including those not returned by the LDAP Query.

It turns out, People Picker returns the superset of the LDAP Query results AND a local user list that is cached in a site collection. You can see this list by going to the Site Collection URL, plus this: “_catalogs/users/”. Note the default view does not allow you to delete items, but if you add a new view, you can add “Edit” as a column, and delete individual users one at a time.

The script below will delete all cached users in a Site Collection (except for Site Collection Administrators); but I don’t think you want to run it, as it will remove all user permissions as well!

  $url = "http://YourSiteCollection"
 
$web = get-spweb $url
$list = $web.Lists["User Information List"]
$listItems = $list.Items
$listItemsTotal = $listItems.Count
for ($x=$listItemsTotal-1;$x -ge 0; $x–-)
{
    Write-Host(“DELETED:+ $listItems[$x].name)
    remove-spuser $listItems[$x]["Account"] -web $url -confirm:$false
}
$web.dispose()

To get this right, we need to extract the LDAP query results into a hashtable, and loop through the cached user list and only remove entries that are not in the LDAP query.