
Handling large or complex datasets in Power Apps can quickly hit limitations—especially with Power Automate’s manual trigger inputs capped at 20. This can complicate efforts to automate processes that involve SharePoint or other data sources. Fortunately, by using JSON parsing within Power Apps, you can work around these restrictions and unlock far more flexible, scalable data handling.
In this guide, we’ll show you step by step how to set up and use Parse JSON Power Automate and Power Apps, so you can retrieve, process, and display SharePoint list data efficiently in your apps. Whether you’re building internal tools or streamlining business workflows, this approach will help you get the most out of the Power Platform.
Follow these steps to set up your SharePoint list and Power Apps flow for JSON parsing:
Step 1: Create a list in the SharePoint site with the following columns:
- Student Name: Single Line of Text
- Birth Date: Date Only
- Course Name: Single Line of Text
- Course Price: Currency
- Course Expire Year: Number

Step 2: Create a new blank canvas in Power Apps. Then, from the left navigation menu, click on Power Automate and create a new flow.
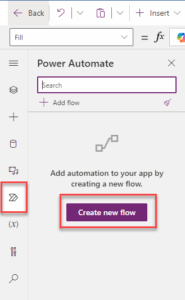
Step 3: After clicking “Create new flow,” click “Create from blank.
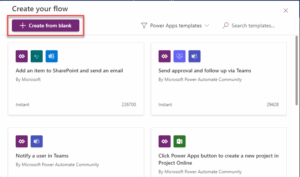
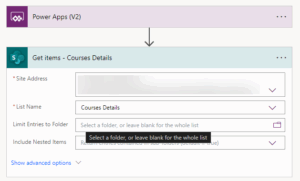
Step 4: After creating the flow, add an action to “Get items” and select the site and list from where you will retrieve the data.
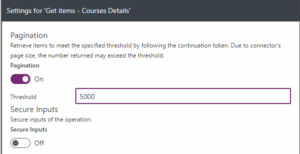
Step 5: SharePoint Get Items action returns up to 100 records by default. To increase the limit, go to the action’s settings menu, turn on pagination, and enter a number in the threshold field. The maximum value is 5000.
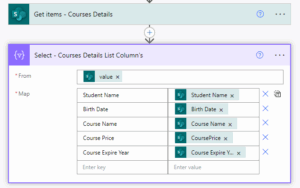
Step 6: Add a “Select” action from the Data Operation after the “Get items” action. Using the “Select” action, you can specify which columns you need.
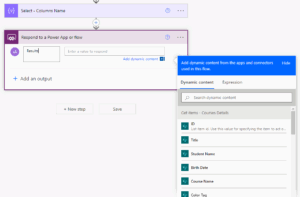
Step 7: Add a “Power Apps – Respond to a PowerApp or flow” action at the end of the flow. Add a text type output called “Results.” Note that the “Select” action output does not appear in the Dynamic content.
Step 8: To get the output, there are two ways. First, add a “Compose” action and put the “Select” output in the “Compose.” Then, put the “Compose” action output in the “Respond to a PowerApp or flow” action.
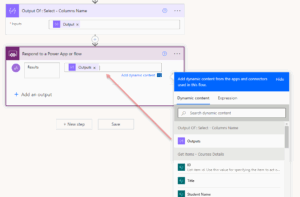
Step 9: Another way you can manually type the expression like this.
![]()
Step 10: Now, add a button to the screen in Power Apps. When this button is pressed, we want to load the flow output into a collection. On the button’s On Select property, we need to create a collection.
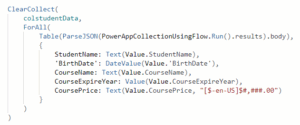
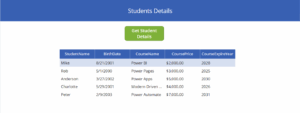
Step 11: To display the data on the screen, we have added a data table. In the data table’s data source, we selected the collection we created. Then, we chose the fields we wanted to show in the table.
Conclusion
This guide offers a thorough walkthrough for integrating power apps Parse JSON to manage data in Microsoft Power Automate. By following the steps, users can set up Parse JSON in power automate, streamlining automation and data handling. From creating SharePoint lists to displaying data, it enhances workflow efficiency in the Power Platform ecosystem.
For businesses looking to optimize these processes, partnering with power apps development services can further improve solution design and implementation.
Want to talk?
Drop us a line. We are here to answer your questions 24*7.


