Introduction to Row-Level Security (RLS)
Knock, knock! Who’s there? Data security!
In today’s data-driven landscape, safeguarding access to sensitive information is not just important—it’s essential. As organizations increasingly rely on tools like Power BI for data analysis and decision-making, ensuring data confidentiality and compliance becomes paramount. Enter Row-Level Security (RLS)—a feature designed to restrict data visibility based on user roles.
With RLS, you can centralize reporting while ensuring that each user only sees the data relevant to their responsibilities. This improves data privacy, supports compliance, and simplifies management, all while delivering tailored insights to users.
Why Use Row-Level Security?
The primary benefits of RLS in Power BI include:
- Enhanced Data Privacy: Protect sensitive information by ensuring users access only authorized data.
- Compliance: Meet regulatory requirements for data segregation and confidentiality.
- Improved Decision-Making: Allow users to make decisions based on relevant and role-specific data.
Configuring Row-Level Security in Power BI
Importing and Preparing Data:
- Open Power BI Desktop.
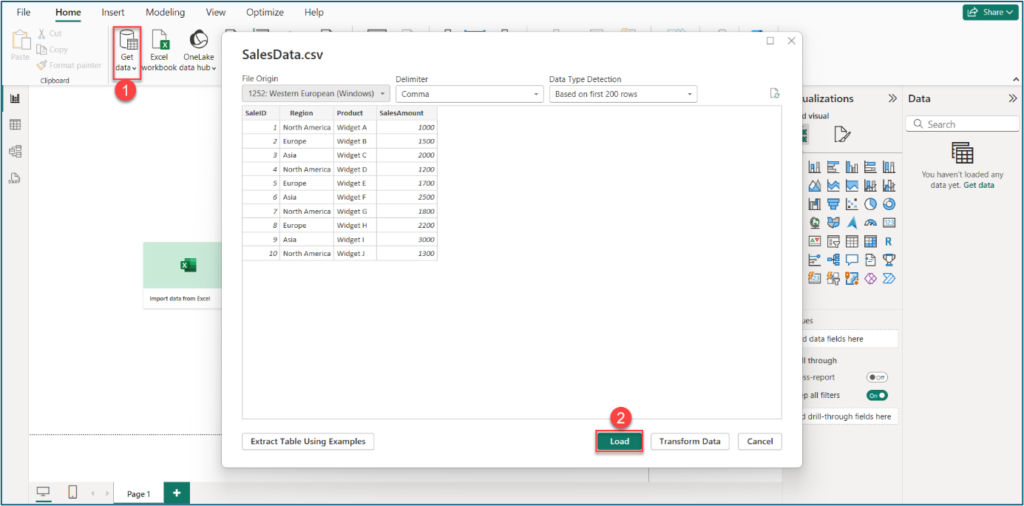
- Select Get Data to import your dataset and load it into the report.

Managing Roles:
Navigate to the Modelling section and select Manage roles.
Creating a New Role:
- Select New to create a role
- Choose the table for which you want to set up restrictions.
- Define your filtering logic:
- Use basic conditions to filter rows (e.g., Region = “Europe”).
- Switch to the DAX Editor for advanced, dynamic filtering.

Example:
- Europe Role: Filter data where the region equals “Europe”.

- North America Role: Filter data where the region equals “North America”.

Testing Your Role:
- Use the View as option to simulate the report for specific roles.
- Select a role and click OK to see the restricted view.
- To revert, click Stop Viewing to return to the unrestricted view.

Result: The view will appear as configured with Row-Level Security (RLS), showing only the data the user is permitted to access based on their role.
Note: After clicking on “Stop Viewing” the data should revert to the normal view, displaying all accessible data without the role-based restrictions.

Saving and Publishing:
Save your report and publish it to your Power BI workspace.

Applying Security Settings in Power BI Service:
- Open Power BI Workspace at app.powerbi.com and select your workspace.

- Navigate to your dataset and click on three dots. Go to security option.

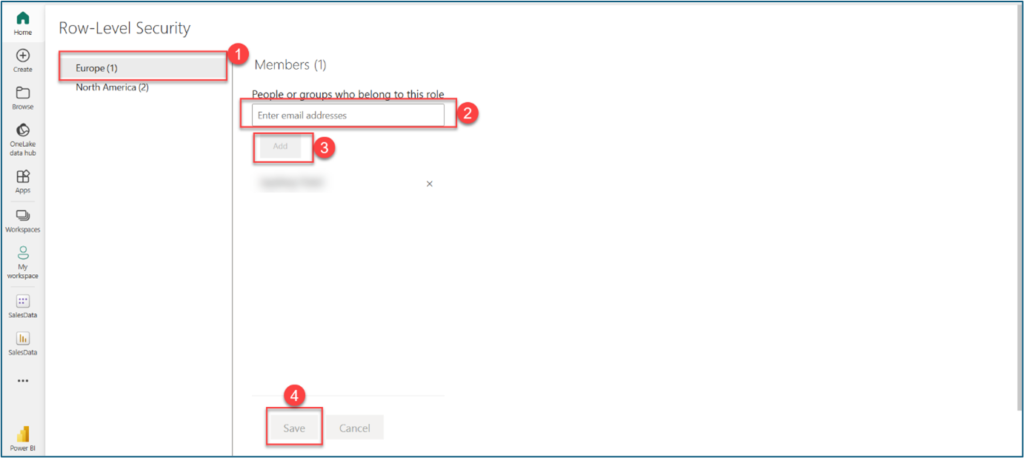
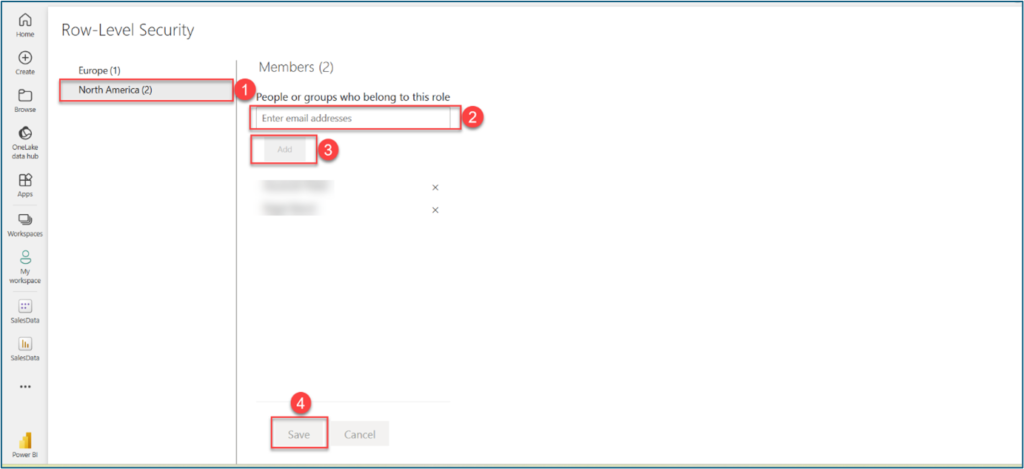
- Select Role-Level Security role, Enter the user’s email address, click the Add button, and save the changes. Now, the user will only see the rows that you want them to see.
Example Role Assignments:
- Europe Role: Assign specific user permissions so that only the designated user can see data filtered for Europe. This role has permission assigned to one user, as shown in the image.

- North America Role: Similarly, assign specific user permissions for a designated user to view only data filtered for North America. This role has permission assigned to two users, as shown in the image.

Note
For Power BI, if a user has either member or admin permissions, they can see all data. Therefore, manage permissions accordingly, especially when using Row-Level Security (RLS).
Conclusion
Row-Level Security (RLS) in Power BI is crucial for protecting sensitive data by ensuring users access only the information relevant to their roles. Using the Security Editor in Power BI Desktop, you can define and manage RLS roles to enhance data privacy and compliance. This guide will help you implement RLS in your reports, providing secure and tailored data access for all users.
Want to talk?
Drop us a line. We are here to answer your questions 24*7.


