
Summary:
- In today’s digital landscape, the demand for offline-capable applications is skyrocketing. With the prevalence of mobile devices and the need for seamless user experiences, mastering the art of developing offline-capable Canvas PowerApps for both Windows and mobile platforms is crucial for staying ahead in the game.
Leveraging Canvas PowerApps for Offline Functionality
- Canvas PowerApps, with their flexibility and versatility, provide the perfect platform for building offline-capable applications. By leveraging features like local data storage and offline data synchronization, developers can create robust solutions that deliver a seamless user experience regardless of network availability.
Creating Application
- Open the Browser and pate the URL: https://make.powerapps.com/.
- Click “Apps” in the left panel.
- Click on the “New app”.

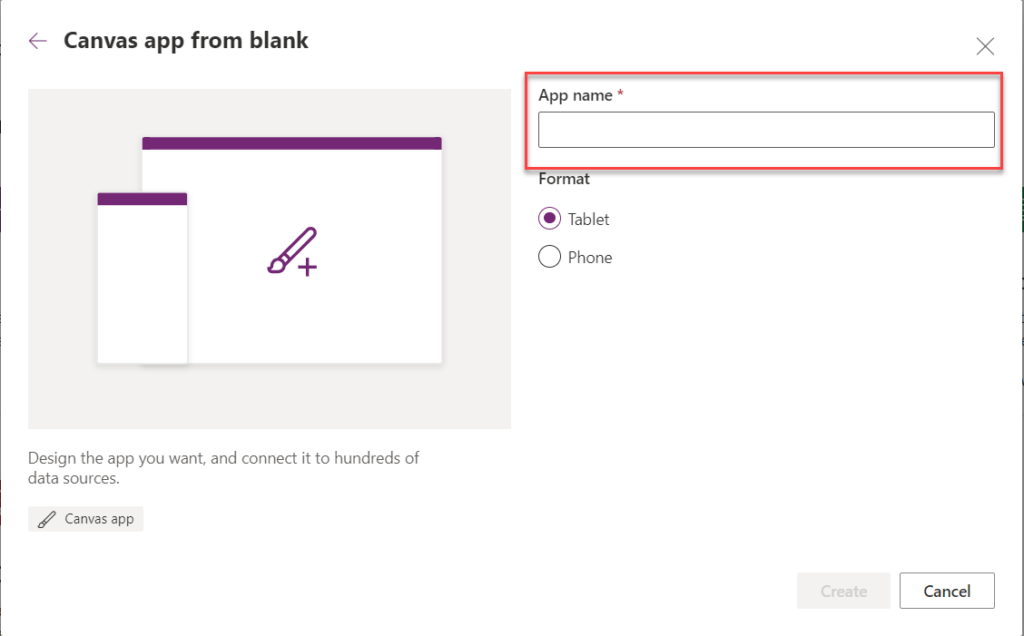
- Choose the Blank Canvas app and enter the app’s name as it appears in the image below:
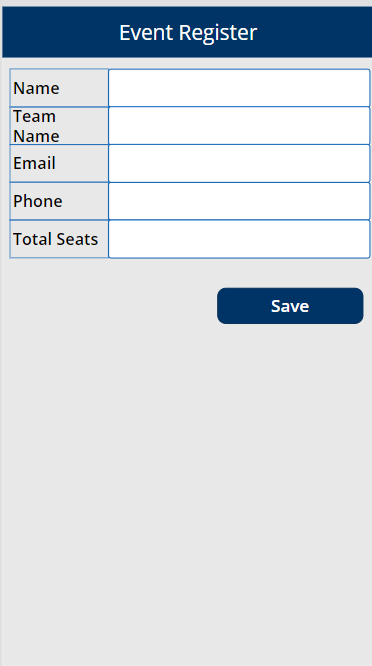
- Once the app is created. Connect to the SharePoint list as data source as we will store the data in SharePoint list. In this example we will utilize the Events list with columns mentioned in below Power Apps UI. Now, create the similar UI in Power Apps.
- If data submission without form control is required, utilize the Patch function to update records effectively.
- Prior to integrating the Patch function, establish a connection to the SharePoint list as the data source, ensuring it is properly configured.
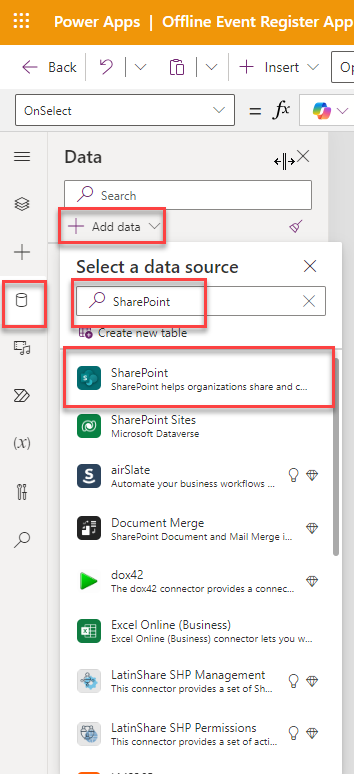
- Navigate to the data Source icon, search for the SharePoint connector, and designate the site where your list is configured.
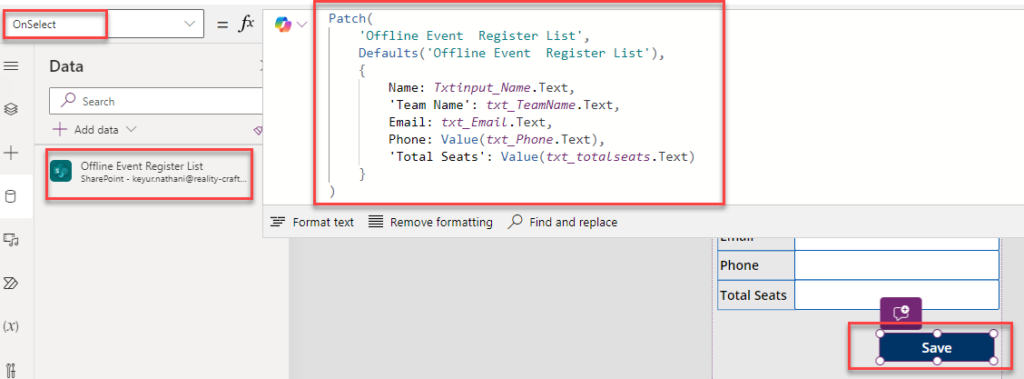
- After successfully establishing the connection to the data source, it will appear on the left side of the interface. Next, incorporate the Patch function into the button’s “on Select” event, as illustrated in the image below.
- Since the Patch function may have limitations, it works only when the network connection is available, consider utilizing Power Apps Collection functionality to store data temporarily. This enables efficient management and manipulation of data within the application.
- Power Apps offers a useful function called Connection. Leveraging this function, we have implemented logic: if the connection is available, we utilize the Patch function; otherwise, we store the data in a collection and save the file locally on the device.
- In Power Apps, to verify the availability of the connection, incorporate an if condition to check if the connection is accessible, as demonstrated in the image below.
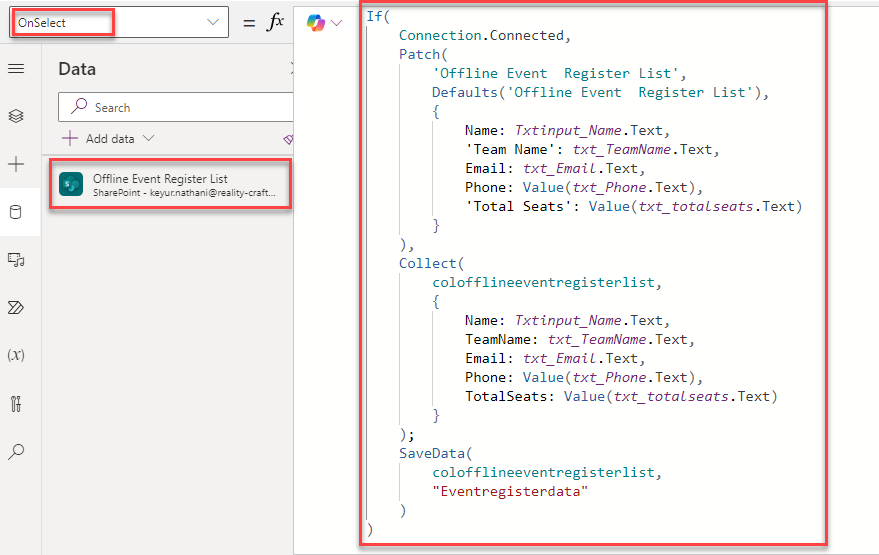
Code:
If (
Connection.Connected,
Patch (
‘Offline Event Register List’,
Defaults(‘Offline Event Register List’),
{
Name: Txtinput_Name.Text,
‘Team Name’: txt_TeamName.Text,
Email: txt_Email.Text,
Phone: Value(txt_Phone.Text),
‘Total Seats’: Value(txt_totalseats.Text)
}
);
Notify (“The Event has been Submitted successfully…”);
Navigate (
SuccessScreen,
ScreenTransition.Cover
),
Collect (
colofflineeventregisterlist,
{
Name: Txtinput_Name.Text,
‘Team Name’: txt_TeamName.Text,
Email: txt_Email.Text,
Phone: Value(txt_Phone.Text),
‘Total Seats’: Value(txt_totalseats.Text)
}
);
SaveData (
colofflineeventregisterlist,
“Eventregisterdata”
);
Notify (“The Event has been Submitted successfully.”),
Navigate (
SuccessScreen,
ScreenTransition.Cover
)
)
- Now, let us incorporate a new Scrollable Screen and integrate a Gallery into the DataCard, as shown in the image below.
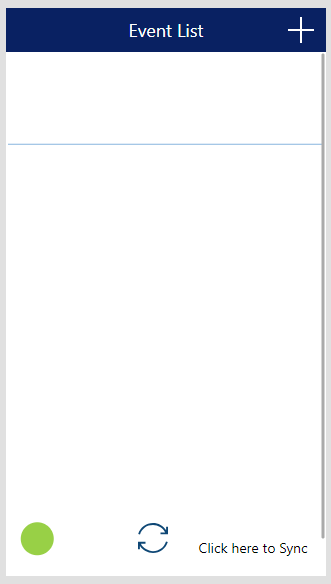
- Certainly! You can integrate the same code into the “OnVisible” property of the home screen to check the network connectivity status and adjust the functionality accordingly. Here is how you can do it:
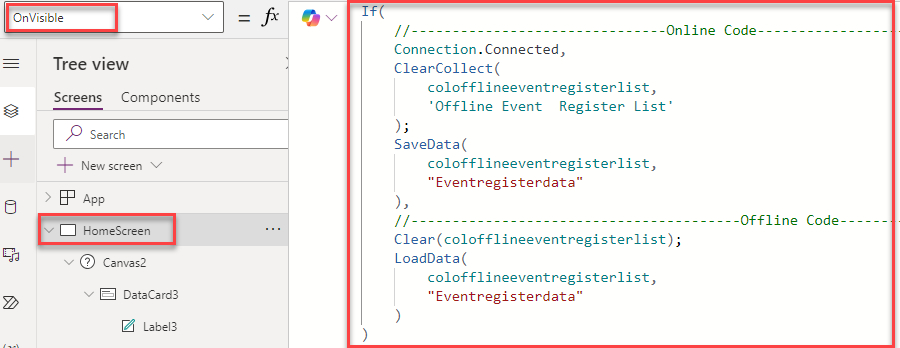
Code:
If (
//——————————-Online Code————–
Connection.Connected,
ClearCollect ( colofflineeventregisterlist,
‘Offline Event Register List’
);
SaveData (
colofflineeventregisterlist,
“Eventregisterdata”
),
//——————————Offline Code———–
Clear(colofflineeventregisterlist);
LoadData (
colofflineeventregisterlist,
“Eventregisterdata”
)
)
- It sounds like you are encountering an error message stating, “There was a problem saving your data. Data cannot be saved when running in a web browser.” This message typically occurs when attempting to save data locally in a web browser environment, which is restricted due to security reasons.
- However, if your app is functioning correctly despite this message, you can safely ignore it. Power Apps sometimes display this message even when data saving is not the main concern or when it is working as intended. Just ensure that your app’s functionality is not affected, and users can continue using it without any issues. If needed, you can provide a brief explanation to users about this message to alleviate any concerns.
- When the app detects that it is in offline mode, users can be informed that their data is being saved locally. When the app goes online, users can click on the Sync icon to synchronize all locally saved items with the SharePoint list. Here is a general approach:

- To change the color of the Circle icon based on the network status (online or offline), you can adjust its fill property dynamically in Power Apps. Here is how you can implement this:
- Define Online and Offline Colors: Define the colors you want to use for representing online (green) and offline (gray) statuses.
- Update Circle Icon Fill Property: Update the fill property of the Circle icon based on the network status. You can use the If function to conditionally set the fill color.
Here is a sample code snippet:
Fill: If (Connection.Connected,RGBA(152,208,70,1),RGBA(149,149,149,1))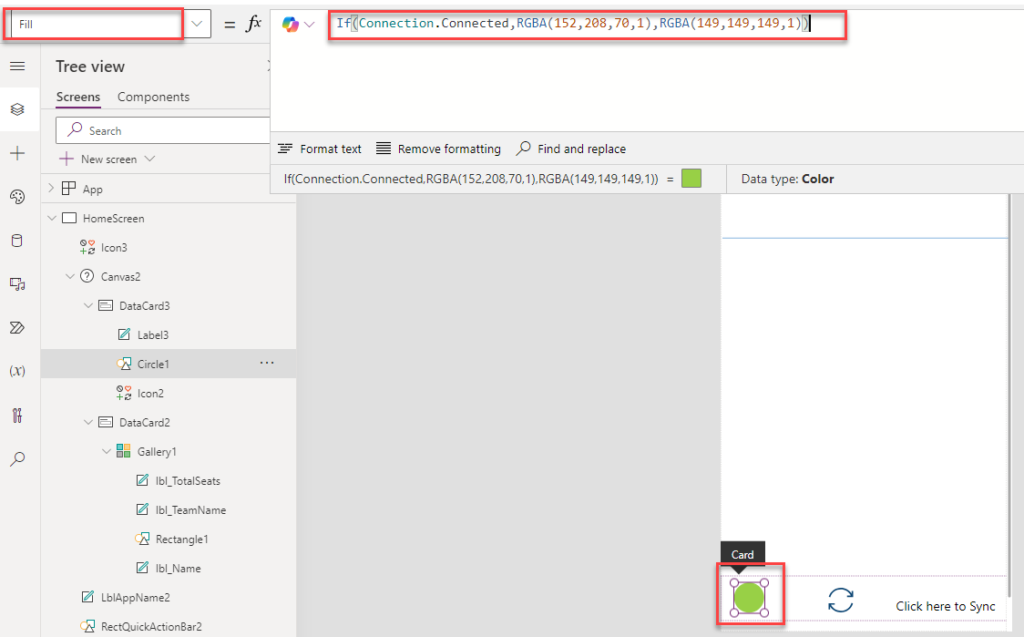
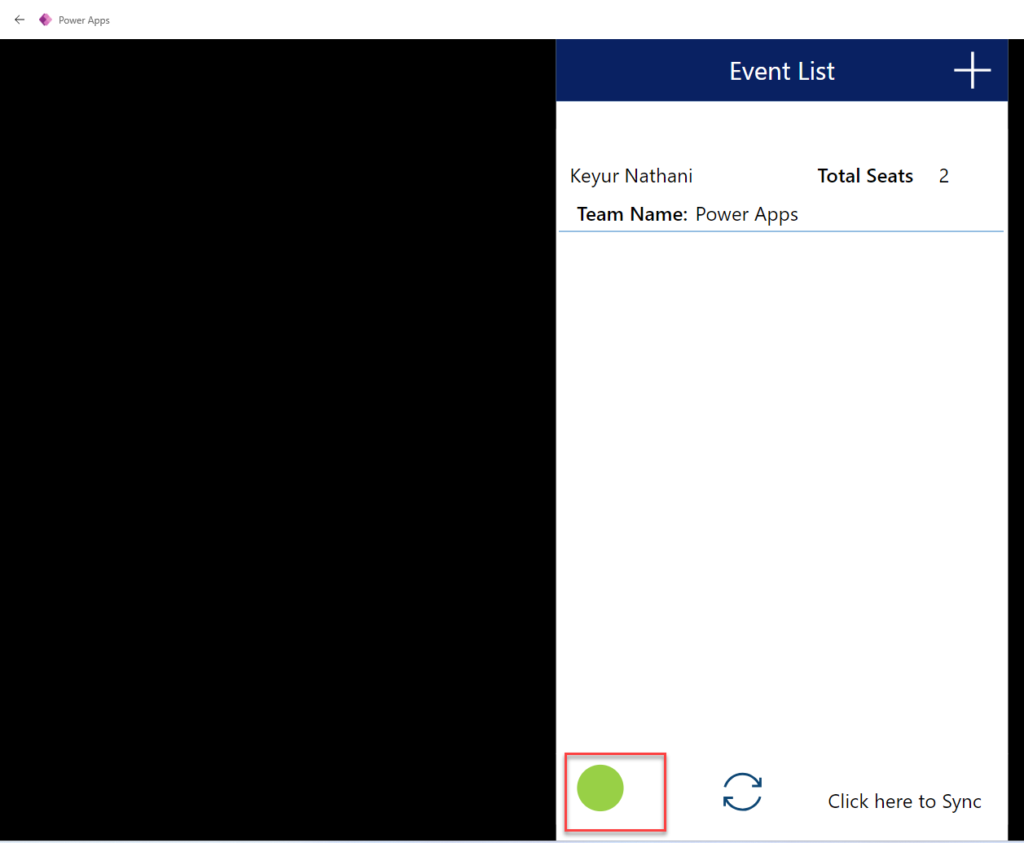
- Now that the app is configured to function offline, you can proceed to install the Power App on your preferred device, whether it is a mobile device or a Windows device.
- After installing the Power Apps application, ensure that you use the correct email address with which the app was shared. This ensures seamless access to the app and its functionalities tailored to your account.
- If you have added new entries to the app while offline, those entries will be stored locally but will not be immediately added to the SharePoint list since the app is offline. However, once the app reconnects to the network, you can implement a synchronization mechanism to upload the locally stored entries to the SharePoint list.
Here is a general approach to achieve this:
- Local Storage: When the app is offline and new entries are added, they should be stored locally using mechanisms like Power Apps Collections or SaveData function.
- Sync Functionality: Implement a Sync button or mechanism that checks for network connectivity. When the app comes online, this mechanism should synchronize the locally stored entries with the SharePoint list using functions like Patch or Collect.
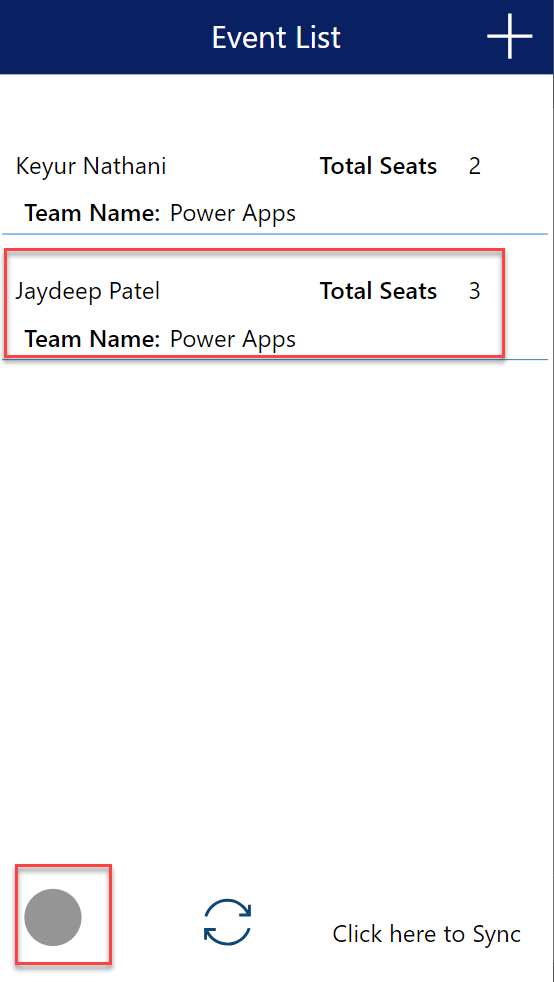
- Here is a SharePoint List snapshot as shown in the below image.

- Now We are Connected the app with Network then it is shown the screen as show into the below image.
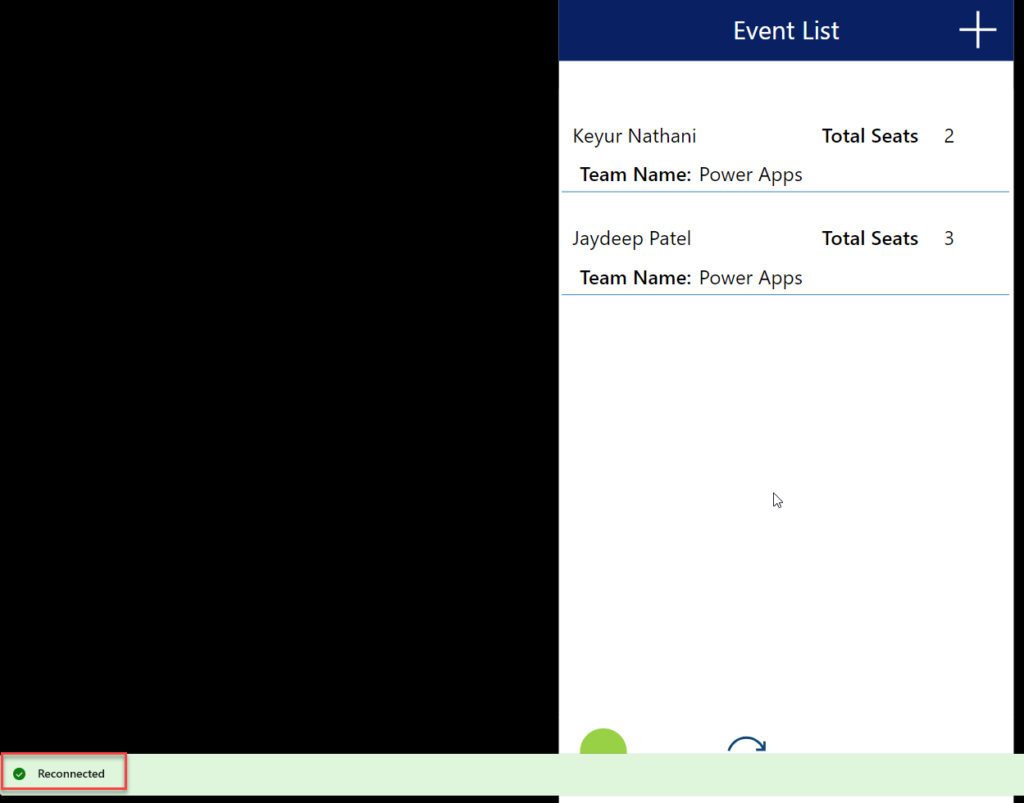
- Now the We click on the Sync Button and check the again the data is insert into our SharePoint list or not.
- After clicking on the Sync button, you will want to verify whether the data has been successfully inserted into your SharePoint list. Here is how you can do it:
- Sync Button Functionality: Ensure that the Sync button triggers the synchronization process, where locally stored data is uploaded to the SharePoint list.
- Notification or Confirmation: Provide a notification or confirmation message to indicate that the synchronization process has been initiated.
- Check SharePoint List: After the synchronization process is complete, manually check your SharePoint list to confirm whether the new data entries have been inserted successfully.

Want to talk?
Drop us a line. We are here to answer your questions 24*7.


