
Steps:
- Download and Install SharePoint Online Management Shell
- Create a custom theme using the Theme Generator Tool
- Navigate to this URL to generate your new theme
- You can use the Colour section to choose your custom Colours that match your brand. You will get to see the sample page render in real-time, showing you what the page will look like with new Colours.

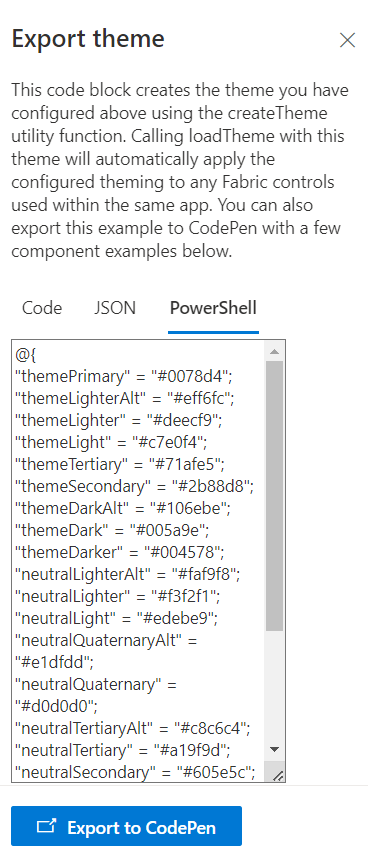
- Next, click Export theme in the upper-right-hand-corner. On the next screen, choose PowerShell tab, then copy all of the text into a Notepad.
- Start SharePoint Online Management Shell:
- After installation, click on the SharePoint Online Management Shell to open it.
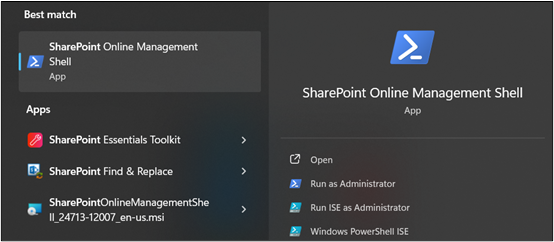
- After installation, click on the SharePoint Online Management Shell to open it.
- Connect to SharePoint Online:
- Paste the following command in the promptConnect-SPOService -Url https://domain-admin.sharepoint.com
(where domain is your SharePoint domain name) - Press Enter and provide your SharePoint admin credentials when prompted
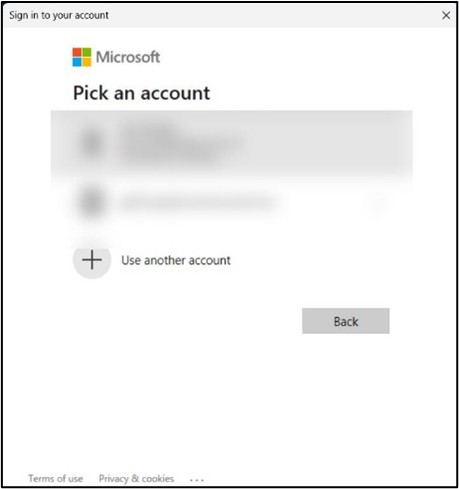
- Paste the following command in the promptConnect-SPOService -Url https://domain-admin.sharepoint.com
- Paste the Theme Script:
- At the command prompt, type in $themepalette = then paste the code you exported. It should look like the image below. Press Enter.
- Next, type the following command:
Add-SPOTheme -Identity “Name of your theme” -Palette $themepalette -IsInverted $false **Where Name of your theme is a theme name you want to give/assign to the theme. **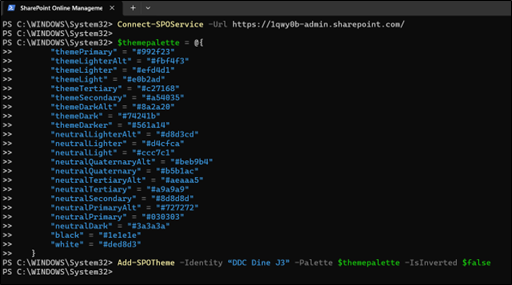
- We can now change to this new theme in SharePoint.
- Verify Installation:
- The custom theme is now installed in your SharePoint Online tenant.
- Navigate to any SharePoint site and access the theming options:
- Click the gear icon (⚙️) in the top right corner. Select “Change the look.”
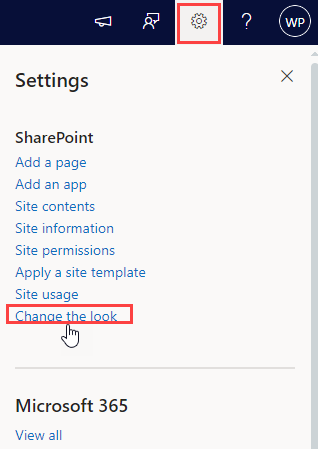
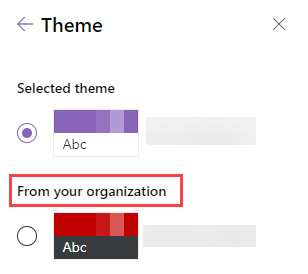
- You should see the custom theme listed there. (From your organization section)
- Click the gear icon (⚙️) in the top right corner. Select “Change the look.”
- This process only installs the theme. You will need to manually apply it to individual sites.
Want to talk?
Drop us a line. We are here to answer your questions 24*7.


