Microsoft Power Pages is a user-friendly platform designed for creating and managing websites without the need for coding expertise. It offers a range of pre-designed themes and templates, enabling users to personalize their site’s styling for a unique look. Within Power Pages, the Default Styling Workspace facilitates detailed customization of fonts, colors, and other elements, while the CSS File Upload method ensures consistent design changes across the entire site. Whether you prefer utilizing built-in tools or custom coding, this guide will assist you in achieving a personalized website.
Custom styling can be implemented in Power Pages through two different methods:
- Default Styling Workspace: Within Power Pages, the Styling Workspace empowers you to customize CSS properties for specific elements across your pages. This functionality enables adjustments to fonts, colors, sizes, and various other attributes of individual elements, granting you precise control over the appearance of each element on your webpage.
- CSS File Upload: In your preferred code editor, you can craft a CSS file tailored to your design preferences and subsequently upload it onto Power Pages. Upon uploading, this CSS file will be universally applied across all pages on your website, ensuring consistent styling and design elements throughout your entire site.
Method 1: Default Styling Workspace
- Upon creating your sites, choose the particular site to which you wish to apply default styling or CSS.
- Click on the “Edit” button corresponding to the site you wish to modify.

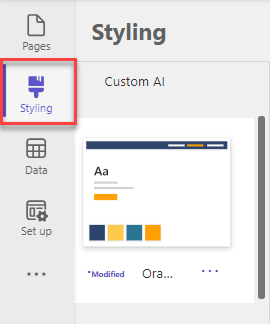
- Navigate to the left-hand panel and choose the “Styling” option from the available menu.
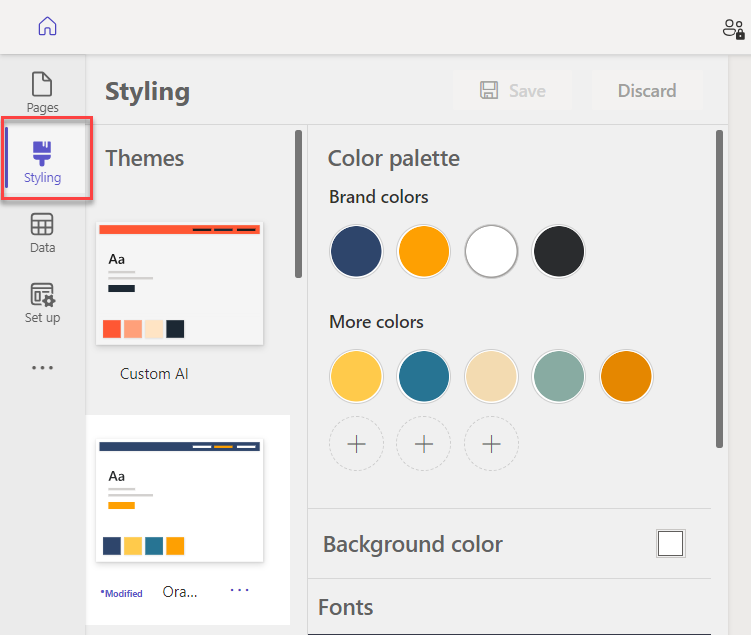
- Choose the desired theme that you wish to apply to your site.
- Once a theme is selected, various elements can be customized to suit your preferences like:
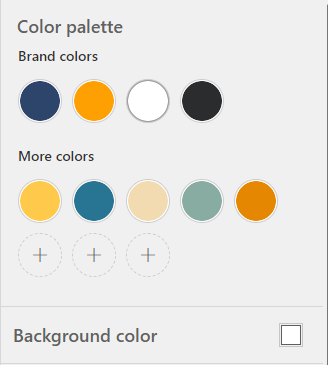
- Brand Color and Background Color: Modify the brand color and background color of the page to your preferred choices.
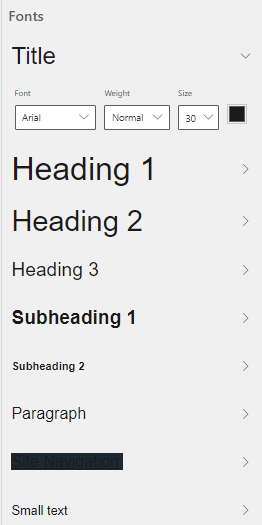
- Fonts: Adjust font-related attributes such as font family, font weight, font size, and font color for various headings to customize the appearance of text on your page.
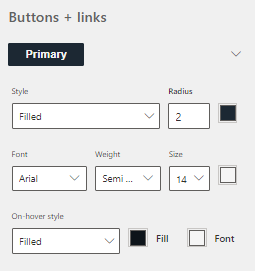
- Buttons: Customize button properties like style, button radius, background color, and additional attributes to tailor their appearance on the page.
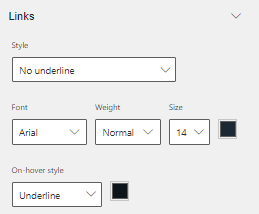
- Links: Modify link properties including the presence of underlines, font style, link text color, hover color, and other attributes to customize the appearance and behavior of links on the page.
- Brand Color and Background Color: Modify the brand color and background color of the page to your preferred choices.
- Once you’ve made the desired styling adjustments, remember to save the changes to ensure they are applied to your site.

- To apply the updated CSS and view the alterations, choose the “Sync” option.

Method 2: CSS File Upload
- Choose the particular site to which you wish to apply custom CSS.
- Click on the “Edit” button corresponding to the site you wish to modify.
- Navigate to the left-hand panel and choose the “Styling” option from the available menu.
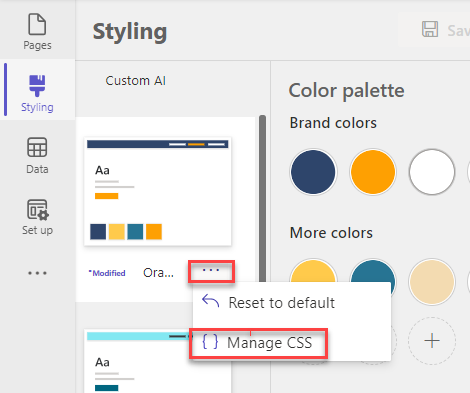
- Within the selected theme, locate the “More” option and then proceed to click on “Manage CSS.”
- Within the Custom CSS section, choose “Upload,” and then select the CSS file you wish to upload for the application.
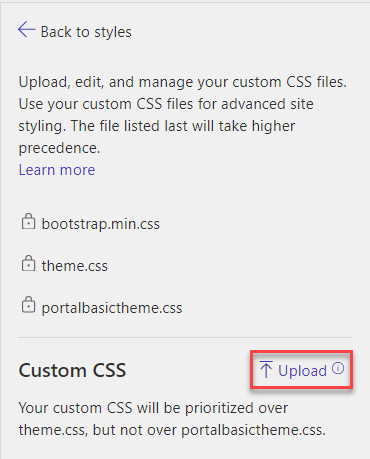 Here is an example of how to apply custom styling on Image in Power Pages
- Create a page and add an image on that page.

- To implement personalized formatting, navigate to the page you’ve generated and click on the Edit option. This action will launch Visual Studio Code for editing purposes.
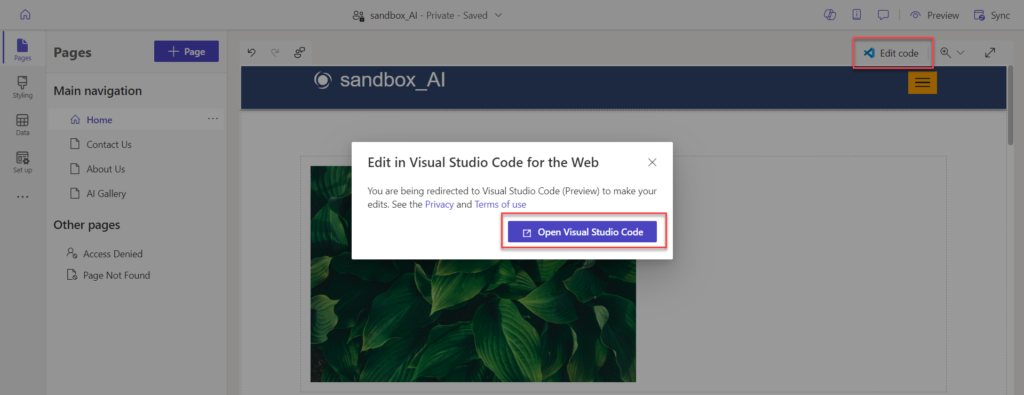
- Assign a class name, for instance, ‘cardimage‘, to the image element

- Go to the ‘image card’ section and find your ‘CSS’ file.
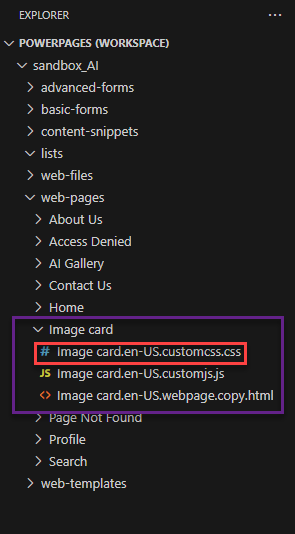
- Apply your customized CSS styling to the image based on your preferences.
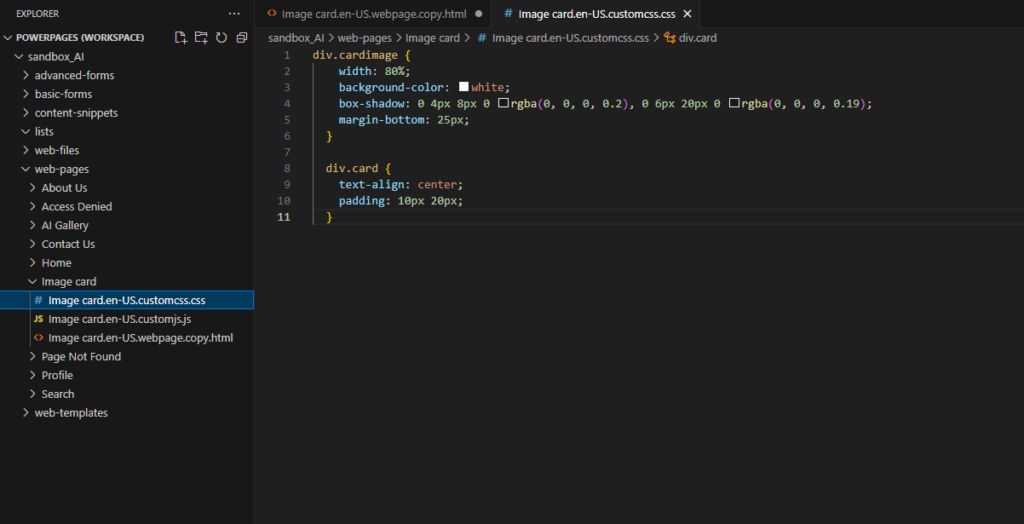
- After making your CSS modifications, save the file by using ‘Ctrl+S‘ (or the appropriate shortcut for your system). Next, revisit your Power Pages site and click on ‘Sync.’
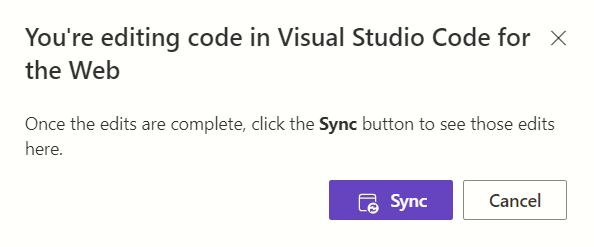
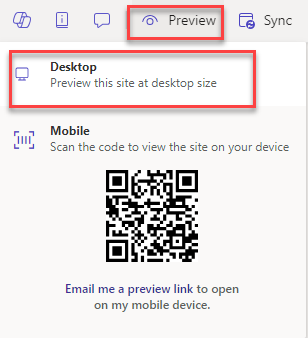
- To preview the alterations on your site, click on ‘Preview’ and choose the ‘Desktop’ option.
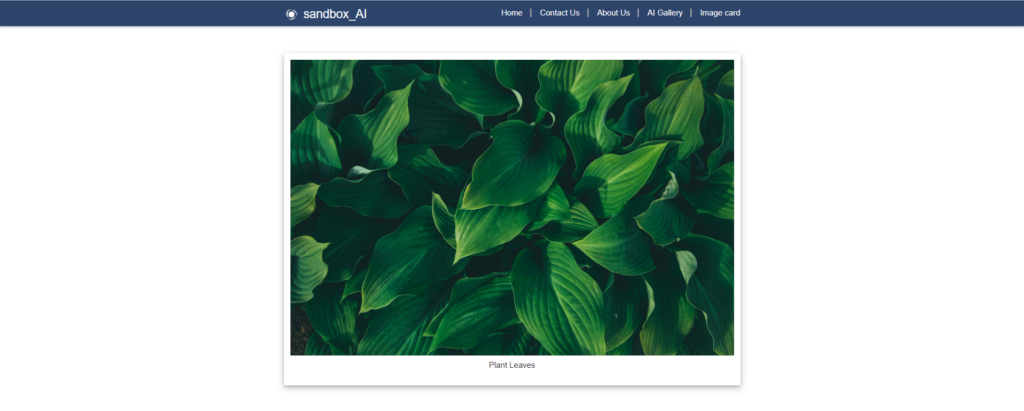
- Once finished, you will observe the image with the personalized style you added.
- Create a page and add an image on that page.
Conclusion
Microsoft Power Pages offers low-code/no-code options for website creation with customizable styling through its Default Styling Workspace and CSS File Upload methods. These features allow for precise control over design elements, enabling users to create a unique website.
Want to talk?
Drop us a line. We are here to answer your questions 24*7.


