The process of “creating logs for Power Automate instances” involves systematically recording and archiving essential information about each step and action taken during the execution of automated workflows. This comprehensive log becomes an asset, offering users insights into the intricacies of their workflows, enabling efficient troubleshooting, and facilitating performance analysis.
In this blog post, we explore the significance of creating logs for Power Automate instances and how it transforms into a practice for users seeking a deeper understanding of their automated processes. Imagine having a detailed record of when a workflow starts, the events that trigger its execution, the data it processes, and the outcomes it produces—all neatly documented for reference. This level of visibility not only enhances troubleshooting capabilities but also empowers users to optimize and refine their workflows for peak efficiency.
Step: 1 First Add the “When an item is created action and add the Site Address and List Name.

Step: 2 Next, add another Compose action to retrieve the workflow URL. Add the expression for get the URL in SharePoint Online.
We need to concat following string in the compose action
String 1: Environment URL (Region needs to be changed as per tenant configuration)
https://asia.flow.microsoft.com/manage/environments
String 2: Environment Name
workflow().tags.environmentName
String 3: “Flows”
String 4:WorkFlow Name
workflow().name
String 5: “Runs”
String 6: Workflow Run Name:
workflow().run.name


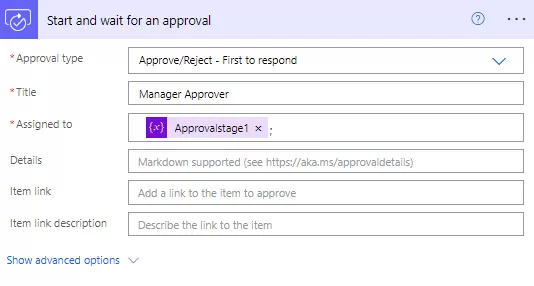
- Approval type: Add the approval type which you want to choose in the choice value.
- Title: Added the Title
- Assigned to: Added the username which you want to send for approval.

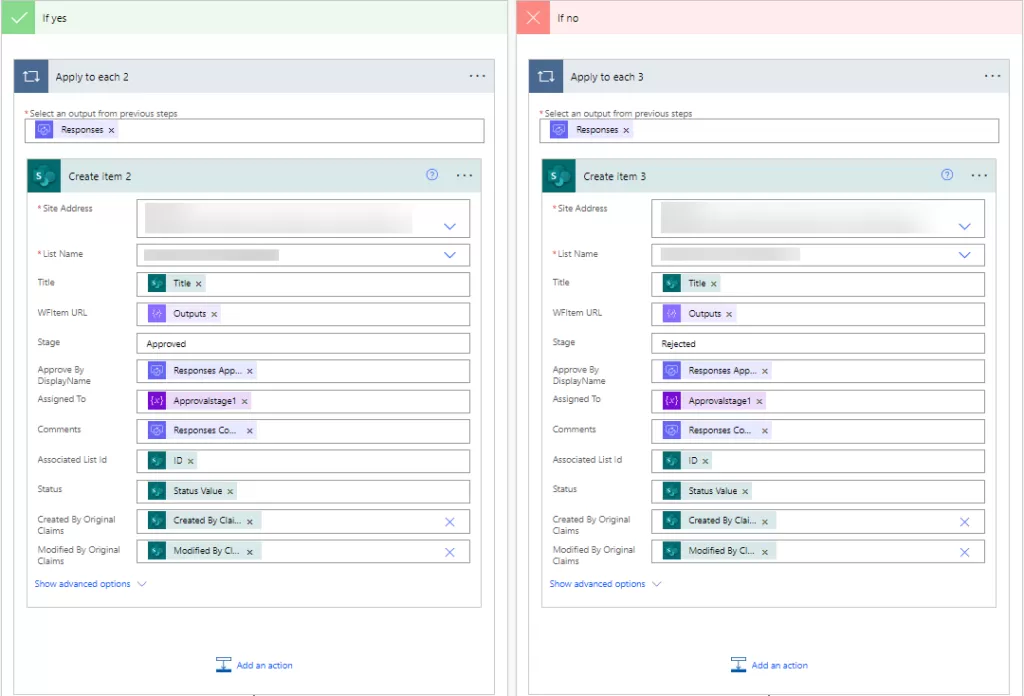
Step: 5 Next, include the condition action and add the dynamic “Outcome” obtained from the “Start and Wait for Approval” action. Ensure it is equal to “Approve,” as shown in the screenshot below.

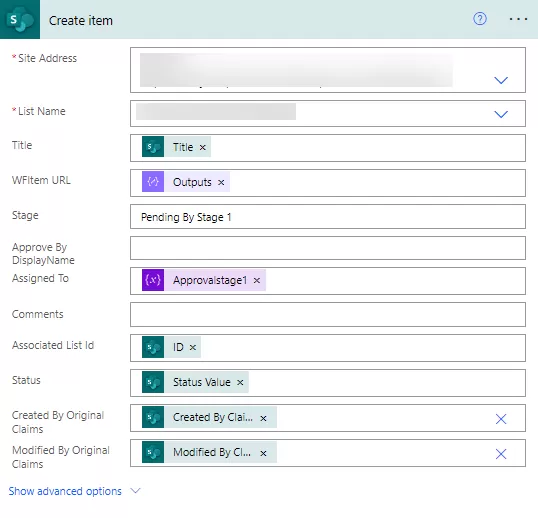
Step: 6 Again, add the “Create Item” action in both sides “If Yes” and “If No.”
Approve By Display Name: Add the dynamic content “Responder display name” obtained from the “Start and Wait for Approval” action. This action is automatically applied in the “Apply to each” loop.
Comments: Add the dynamic content “Responses Comments” obtained from the “Start and wait for Approval” action.

Step: 7 Create a new entry in the SharePoint list and verify the flow.
- Below is a screenshot of the Workflow History list, where we create a log. It displays all the column values that we add in the “Create Item” action in Power Automate.

Want to talk?
Drop us a line. We are here to answer your questions 24*7.


