
If you’re building a user-friendly app with Power Apps, chances are you’ve used Table control to display lists of data in a clean, tabular format. However, one limitation developers often face is the inability to directly add custom columns like you would in a gallery. But don’t worry, there’s a simple workaround!
In this blog, we’ll walk you through how to add a custom column to a Table control by extending the data source using calculated fields. And yes, we’ll keep it easy and beginner-friendly!
Real-World Scenario
Let’s say you’re working with SharePoint data, and your list contains columns like:
- First Name
- Last Name
- Joining Fees (which is a currency column)
Now, when you connect this list to a Power Apps Data Table control, you might notice two things:
- The Joining Fees column shows up as just a number it doesn’t look like currency.
- There’s no way to show a Full Name by combining the first and last names.
That’s where a small trick using Power Apps formulas comes in handy.
This is the SharePoint data that I want to display in the Power Apps table control.
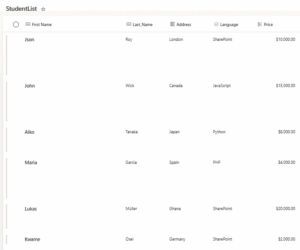
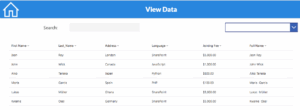
I have now added a custom column in Power Apps and populated it with the data, which is visible in the table control shown in the image below.
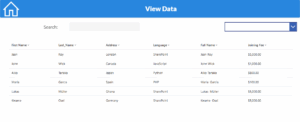
As we can see here, the ‘Joining Fees’ column in SharePoint is a currency column. However, when we add it to the table control in Power Apps, it doesn’t appear as a currency column. So, we’ll explore how to format this using a custom column. We’ll also look into how we can merge the ‘First Name’ and ‘Last Name’ columns in this Power Apps table column guide.
Step-by-Step Guide to Add a Custom Column
Step 1: Use the Add Columns Function
| AddColumns(
YourSharePointList, FormattedFee, Text(ThisRecord.’Joining Fee’, “$#,###.00”), Full Name, Concatenate(ThisRecord.’First Name’, ” “, ThisRecord.Last_Name) ) |
First, select your Table control and go to its Items property. Instead of just binding your SharePoint list directly, use the AddColumns function to create custom columns:
This creates two new columns: Full Name and Formatted Fees.

Step 2: Update the Table Fields
Click on the Table control, then go to the Fields property pane on the right.
- Click Edit Fields
- Remove the old columns (like First Name, Last Name, and Joining Fees)
- Click Add field and select the new custom columns (Full Name and Formatted Fees)
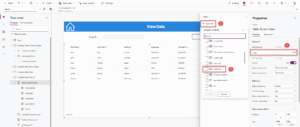
Step 3: Rename the Column Headers
You can rename the column headers to make them user-friendly:
- Click on each column in the Table control
- Go to the Header Text property
- Change it to something like “Full Name” or “Joining Fees”
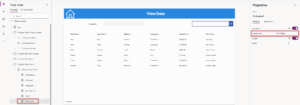
What You Get in the End
Now, your Table control will display:
- A clean Full Name column combining first and last names
- A Joining Fees column formatted as currency
This not only makes your app look more professional but also improves the user experience.
Bonus Tips
- You can use the same method to add columns like Age (from Birthdate), Status Labels, or even calculated totals.
- Keep your formulas simple for better performance.
- Always test on a small set of data first.
Conclusion
Customizing a Table control in Power Apps doesn’t have to be complicated. With a simple formula and a few clicks, you can shape your data the way you want. By using AddColumns, you gain the ability to enhance your app’s visuals and functionality all without using collections or complex logic.
This trick is especially helpful when you need to merge fields, apply formatting, or display user-friendly data views. Keep experimenting, and you’ll discover how flexible and powerful power apps development services can be.
Want to talk?
Drop us a line. We are here to answer your questions 24*7.


