68% of enterprises experience data loss during poorly planned file migrations (Gartner). Before you move a single file to SharePoint Online, you need to know: this isn’t about technology – it’s about safeguarding your business continuity.
Sure file shares were manageable when your organization was smaller or operated from a single location.
But now you require something that facilitates real-time collaboration, secure remote access, perhaps records retention, records management, and improved control over what is seen by whom, what can be shared, and what can be downloaded. And that is where SharePoint Online truly shines.
In contrast to conventional file servers, SharePoint Online is designed to meet the needs of today’s teams. It has real-time editing, documenting co-authoring cloud-based access, version control, and seamless integration with Microsoft 365 applications.
So when you’re considering how to migrate file share to SharePoint Online, you’re not only moving files, you’re actually changing how users do their daily work.
What Makes File Share to SharePoint Migration So Tricky?
Moving files from a local file server to SharePoint Online might sound simple, just drag and drop, right? Not quite.
If you’ve been using file shares for years, chances are they’ve turned into a digital junk drawer: outdated documents, inconsistent folder names, confusing permissions, and little to no structure.
And when you try to lift and shift that mess into SharePoint? Things can go sideways fast.
- File Shares Get Messy Over Time
It’s normal. As teams grow and change, folders pile up, naming conventions drift, and documents get duplicated. There’s usually no real governance in place. What worked fine for a smaller, centralized team now feels clunky and chaotic.
Trying to migrate everything “as-is” is a common trap. You think you’ll clean it up later but that “later” never comes. And once the files are in SharePoint, the window to restructure and organize easily is often closed. The best time to clean house is *before* you move.
Pro Tip: A successful migration starts with a refined structure, a clear content map, permission planning, and accurate file counts. If your taxonomy is already a mess, migrating without fixing it can backfire. Learn how to avoid this trap in this guide on fixing bad SharePoint taxonomy term references.
- Permissions Work Differently in SharePoint
File servers usually depend on folder-level permissions, often managed informally by IT or department heads. SharePoint, on the other hand, has a more granular and collaborative approach. If you migrate without reviewing and redesigning permissions, you could expose sensitive files or block users from what they need.
Planning permissions ahead of time is non-negotiable if you want a secure and user-friendly environment post-migration. We recommend following SharePoint security best practices to avoid exposure risks during or after migration.
- You’ll Hit Technical Roadblocks
SharePoint has rules. Long file paths? Unsupported characters? File types or sizes that won’t upload? These limitations can grind your migration to a halt if you’re not prepared.
For unsupported file types or extremely large files, you may need to find alternate storage solutions but they should still integrate smoothly with your team’s workflow.
Avoid surprises: Run pre-migration reports to catch and fix issues like invalid file names, long paths, and problematic formats *before* migration day.
Most Overlooked Technical Limits:
- Files over 15GB require special handling
- 400+ character paths break migrations
- 30+ unsupported characters will fail transfers
- Users Don’t Like Surprises
Your users have been working a certain way for years mapped drives, shared folders, drag-and-drop. Now you’re introducing document libraries, web-based editing, metadata, and a whole new interface.
Without clear communication, training, and support, you’ll likely face frustration, confusion, and resistance.
Change management isn’t optional. It’s the key to adoption. Train users on what’s new, coach them on SharePoint’s features, and give them time to adjust.
- Plan the Cutover Carefully
Once the migration is complete, don’t forget to switch the old file share to read-only . Otherwise, a few users might keep working in the old system, and before you know it, you’ve got version conflicts and a messy attempt at reconciling changes between the source and SharePoint.
Communicate the timeline clearly. Let people know when the switch is happening, what to expect, and where to get help. The smoother the transition, the faster your team gets back to work with better tools.
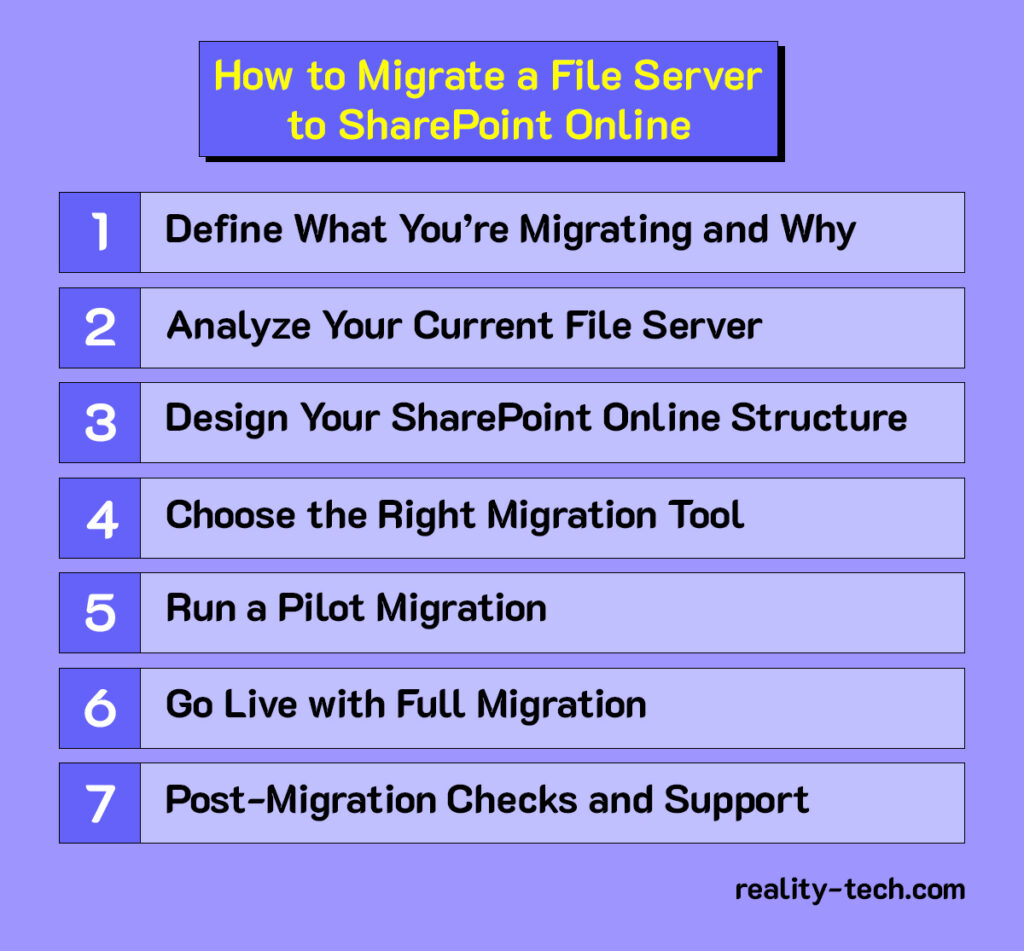
How to Migrate a File Server to SharePoint Online
A successful migration from a traditional file server to SharePoint Online is about more than moving files; it’s about improving how your organization stores, accesses, and collaborates on content. That means the real work begins long before the first file transfer.
Here’s a step-by-step guide to ensure your migration is well-planned, well-executed, and embraced by your users.

Step 1: Define the Migration Scope and Objectives
Start by asking: What exactly are we moving and why?
Are you migrating everything, or only specific drives or department shares? Take this opportunity to leave behind outdated or irrelevant files. Archive inactive content in long-term storage and focus on migrating only what’s actively used.
A clean start in SharePoint leads to better performance and less user confusion post-migration.
Step 2: Assess and Analyze Your File Server
Before you build anything new, you need to understand what you’re dealing with. Go beyond counting files conduct a full audit that includes:
- File types and sizes
- Folder structure depth
- Access controls and sharing permissions
- Unsupported characters and illegal file names
- File paths that exceed SharePoint’s 400-character limit
Step 3: Design an Optimal SharePoint Architecture
SharePoint Online isn’t just a file server in the cloud, it’s a smarter way to organize and manage content. Instead of replicating your existing structure, take the time to design an information architecture based on how your teams work today.
- Create site collections by business unit or function
- Use document libraries for logical grouping
- Rely on metadata and views instead of deep folder hierarchies
A flatter, metadata-driven structure makes content easier to search, manage, and govern.
Step 4: Select the Right Migration Tool
Manual drag-and-drop transfers can work for small volumes but they don’t scale, and they don’t preserve metadata or permissions.
For most organizations, using a purpose-built migration tool is essential. Options include:
- Microsoft Migration Manager (free, great for native integration)
- ShareGate (excellent reporting and mapping)
- Movebot (cloud-based, lightweight alternative)
These tools help ensure a smooth transfer, offer detailed logs, and support incremental migration if needed.
Step 5: Conduct a Pilot Migration
Before going all-in, test your approach with a small group such as a single department or project team.
- Migrate their files into SharePoint Online
- Have them work with the new structure
- Gather feedback and resolve any technical or usability issues
This test run helps validate your plan and gives stakeholders a preview of the post-migration experience.
Step 6: Execute the Full Migration
With lessons from the pilot in hand, you’re ready for the full rollout. Choose your rollout style based on your data size and business needs:
- All-at-once migration: Best for smaller environments, typically over a weekend
- Phased migration: Move department by department over several days or weeks
Communicate clearly with users. Let them know when their content will be moved, what changes to expect, and where to get support. Consider migrating during off-peak hours to minimize disruption.
Step 7: Post-Migration Validation and User Enablement
Once the migration is complete, your work isn’t done. Now comes the critical phase of validation and user adoption.
- Confirm all content was transferred successfully
- Verify permissions and metadata
- Check that folder structures and search functionality work as expected
- Provide training on SharePoint’s capabilities (like versioning, co-authoring, and metadata filtering)
- Monitor usage and adoption metrics
Ensure the legacy file server is switched to read-only to prevent users from accidentally working in two systems and creating conflicting versions.
What Does a Secure SharePoint Migration Actually Look Like?
Make Security a Priority in Your SharePoint Migration
When moving from a file share to SharePoint Online, security should come first. SharePoint has strong built-in features, but they only work well if set up correctly.
Start with Permissions:
Avoid copying over old folder-level permissions; they’re often messy and outdated. Instead, switch to role-based access control. Set up roles like HR Manager or Project Lead, and give access based on those roles. It’s safer and easier to manage.
Use Version Control:
SharePoint automatically keeps track of file versions. Your team can work on the same document and still go back to an earlier version if needed. No more messy email chains with file names like “Final_v5_reallyfinal.pdf.”
Protect Sensitive Data:
Turn on Microsoft Purview sensitivity labels and Data Loss Prevention (DLP) to classify and protect important files. These tools help stop sensitive data from being shared the wrong way.
Enable Multi-Factor Authentication (MFA):
MFA adds a layer of protection by requiring more than just a password. It’s especially useful when people work remotely or use personal devices.
Monitor Activity:
Use tools like Microsoft Defender for Cloud Apps or Microsoft 365 audit logs to track user actions. You’ll get alerts for unusual behavior like mass downloads or strange sharing activity.
Why Partnering with Experts is a Smart Move
If this all sounds like a lot it is. That’s why many businesses turn to providers of Expert SharePoint Services to lead or assist with the migration. These experts bring years of hands-on experience, follow Microsoft’s best practices, and know how to handle edge cases that might derail an internal IT team.
Working with professionals means more than just getting the job done; it means getting it done right. They can help with discovery, cleanup, architecture planning, tool selection, pilot testing, execution, and post-migration support.
Most importantly, they can train your staff, create documentation, and establish governance so that your new SharePoint environment doesn’t devolve into a digital dumping ground.
These service providers often bundle in Microsoft SharePoint Support Services, giving you a lifeline for months after the migration. So, if permissions break, sync errors appear, or users get confused, you’re not scrambling for answers.
Closing Thoughts
Migrating your file server to SharePoint isn’t just about shifting files from Point A to Point B. It’s a strategic move that affects how your business collaborates, communicates, and secures data.
When done right, it improves teamwork, makes documents easier to access, and supports your digital transformation goals. But if done poorly, it can cause data loss, confusion, and business disruptions.
If you’re serious about getting it right, consider working with experts. SharePoint Migration Services and Microsoft SharePoint Support Services can help with everything from planning the structure to training your team, making your migration smooth, secure, and successful.
Want to talk?
Drop us a line. We are here to answer your questions 24*7.


