
The SharePoint Filter Query is a powerful feature that allows users to refine and manipulate data within their Power Automate workflows efficiently. This blog aims to provide an in-depth exploration of how to leverage this functionality effectively, offering insights and tips.
- The filter query typically follows a syntax that depends on the data source you’re working with. In SharePoint, for example, you can use OData (Open Data Protocol) syntax to construct your filter query. This syntax allows you to specify conditions such as equals, not equals, greater than, less than, contains, starts with, ends with, and more.
- The Filter Query is a powerful tool to retrieve only the data you need, reducing unnecessary processing and improving efficiency in your workflows.
- Single line of text: Starting with the internal name of the single line of text, followed by “equals (eq)” and the corresponding single line of text value.

Column Type Available operator(s) | Functions Usage Example Single line of text eq [equals] ne [not equals]
startswith() [column value begins with…]
substringof() [column value contains…]
Column eq ‘value’ Column ne ‘value’ startswith(Column, ‘value’) substringof(‘value’, Column)
Title eq ‘My Item’ Title ne ‘My Item’ startswith(Title, ‘My’) substringof(‘Item’, Title)
- Choice Column: Input the internal name of the Choice column, followed by “equals” to specify the user’s preference for displaying only pending items. Enclose the desired value in brackets.

Column Type Available operator(s) | Functions Usage Example Choice (menu to choose from) eq [equals] ne [not equals]
startswith() [column value begins with…] substringof() [column value contains…]
Column eq ‘value’ Column ne ‘value’ startswith(Column, ‘value’) substringof(‘value’, Column)
Status eq ‘Approved by manager’ Status ne ‘Not approved’ startswith(Status, ‘Approved by’) substringof(‘by manager’, Status)
- Number Column: Start by entering the internal name of the column, followed by “equals (eq)” and the number you want to specify. Do not include the number value within the single quotes.
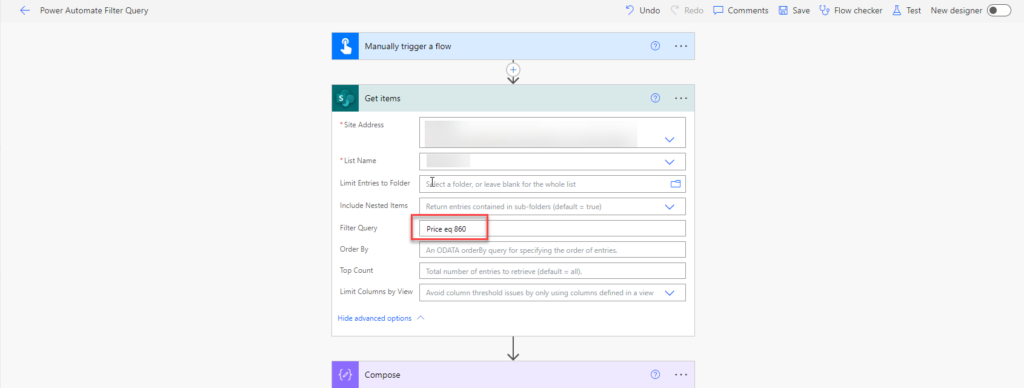
Column Type Available operator(s) | Functions Usage Example Number (1, 1.0, 100) eq [equals] ne [not equals]
lt [less than]
le [less or equal than]
gt [greater than]
ge [greater or equal than]
Column eq number Column ne number
Column lt number
Column le number
Column gt number
Column ge number
Value eq 20 Value ne 100
Value lt 1000
Value le 50000
Value gt 200
Value ge 50
- Currency Column: Start by entering the internal name of the Currency column equals(eq) enter the value which user want to filter and run the flow show the output.
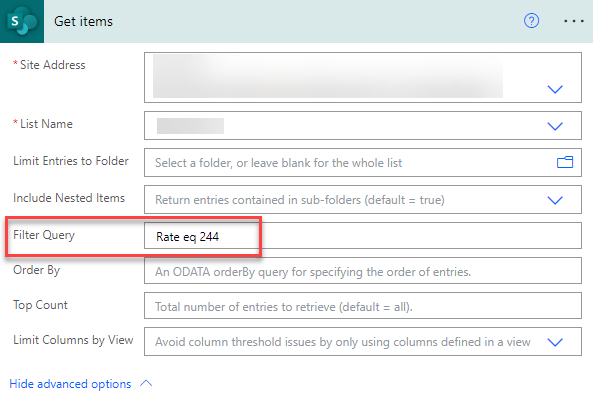
Column Type Available operator(s) | Functions Usage Example Currency ($, ¥, €) eq [equals] ne [not equals]
startswith() [column value begins with…]
substringof() [column value contains…]
lt [less than]
le [less or equal than]
gt [greater than]
ge [greater or equal than]
Column eq number Column ne number
startswith(Column, ‘value’) substringof(‘value’, Column)
Column lt number
Column le number
Column gt number
Column ge number
Rate eq 20 Rate ne 100
startswith(Rate, ‘5’) substringof(‘500’, Rate)
Rate lt 1000
Rate le 50000
Rate gt 200
Rate ge 50
- Date and Time: Enter the internal name of the date column, followed by “equals (eq),” and input the desired date for filtering. Ensure that you enclose the date in single quotes and here to the date format as shown: Date Format (“yyyy-mm-dd”).
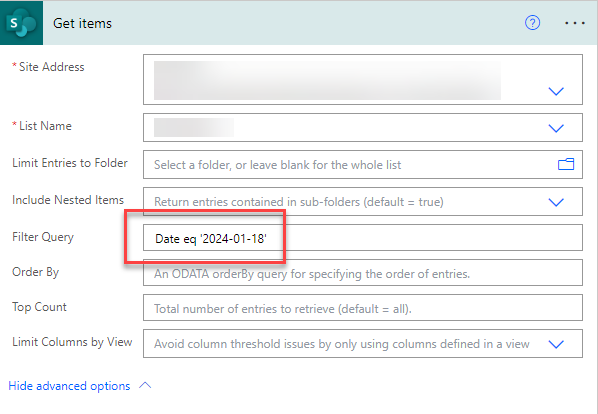
Column Type Available operator(s) | Functions Usage Example Date and Time eq [equals] ne [not equals]
lt [less than]
le [less or equal than]
gt [greater than]
ge [greater or equal than]
Date eq ‘date’ Date ne ‘date’
Date lt ‘date’
Date le ‘date’
Date gt ‘date’
Date ge ‘date’
Date eq ‘2024-01-18’ Date ne ‘2024-01-18’
Date lt ‘2024-01-18’
Date le ‘2024-01-18’
Date gt ‘2024-01-18’
Date ge ‘2024-01-18’
- Lookup Column: Begin by including the internal name of the Lookup column, followed by “equals (eq),” to specify the lookup ID.
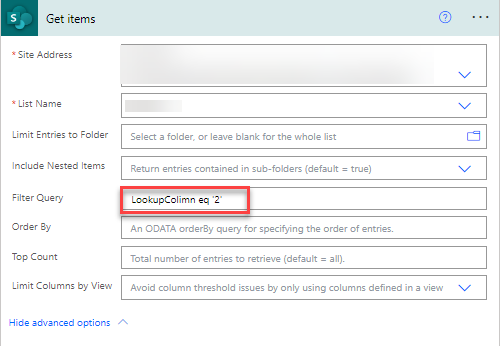
Column Type Available operator(s) | Functions Usage Example Lookup eq [equals] ne [not equals]
Lookup eq ‘Lookup ID’ Lookup ne ‘Lookup ID’
Lookup eq ‘123’ Lookup ne ‘123’
- Checkbox: Yes/No Checkbox: Input the internal name of the checkbox, followed by “equals (eq),” and add either ‘0’ or ‘1’.
‘0’ corresponds to “No.”
‘1’ corresponds to “Yes.”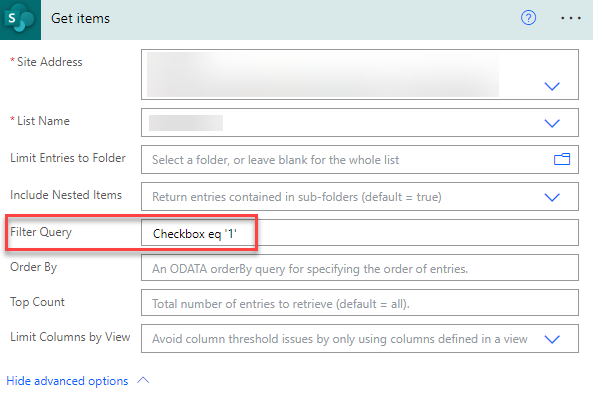
Column Type Available operator(s) | Functions Usage Example Yes eq [equals] ne [not equals]
Checkbox eq 1 Checkbox ne 1
Checkbox eq 1 Checkbox ne 1
No eq [equals] ne [not equals]
Checkbox eq 0 Checkbox ne 0
Checkbox eq 0 Checkbox ne 0
- Person or Group: Input the internal name of the person or group, followed by “equals (eq).” Add either the email address or the first name and last name of the person.
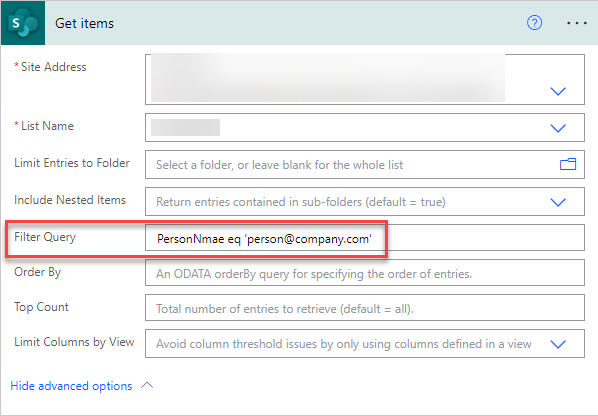
Column Type Available operator(s) | Functions Usage Example Person or Group eq [equals] ne [not equals]
Person/EMail eq ’email address’ Person/Title eq ‘user name’
Person/EMail ne ’email address’
Person/Title ne ‘user name’ ‘user name’
Person/EMail eq ‘person@company.com’ Person/Title ne ‘Firstname Lastname’
In conclusion, Power Automate Filter Query emerges as a crucial tool for refining data workflows. By mastering its syntax and leveraging its capabilities, users can efficiently filter and process data, ensuring relevance and accuracy.
This feature enables dynamic automation, allowing for tailored and precise data handling. Embracing Power Automate Filter Query empowers users to optimize workflows, enhancing overall efficiency in their automation endeavours.
Want to talk?
Drop us a line. We are here to answer your questions 24*7.


