
Summary
While creating a PowerApps app, we needed to add a button that would be visible only for a particular set of users who were present in a specific group in SharePoint. This was accomplished with the help of Flow.
We would check with the help of Flow that the user that is trying to access the App, is present in the group or not. If yes, the button is available and if not, the button won’t be.
The approach goes like,
Step-1
Create a SharePoint Security Group and add the users who would have the access to the button in PowerApps App.
And enable the access to view the members of the Group to Everyone, so that when the user tries to login, not all users would be in the group.

Step-2
Creating the Flow
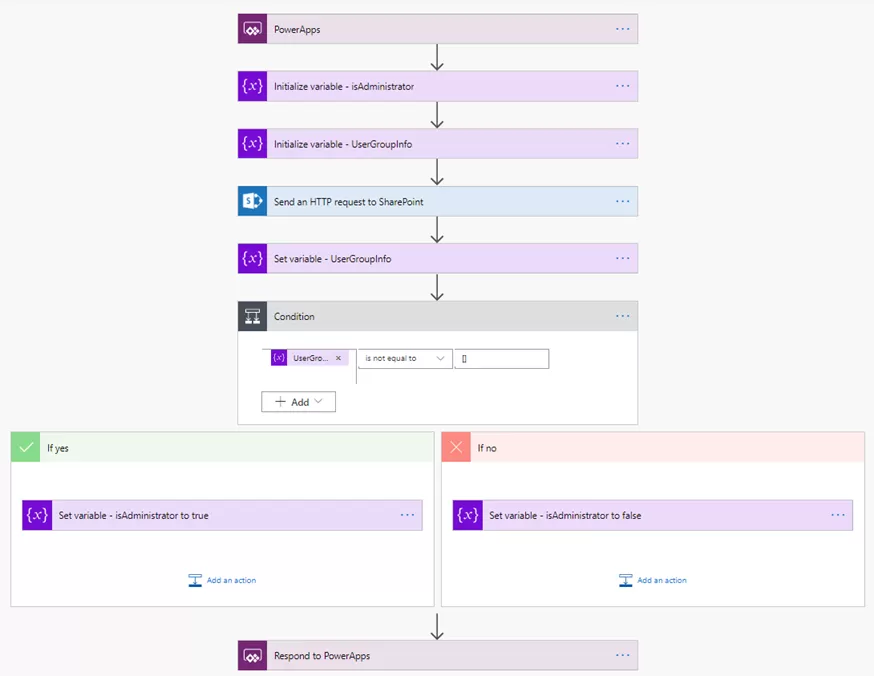
- Create the Flow, with the trigger PowerApps of PowerApps connector.

- Add an action, Initialize variable of Variables connector. Set the name as isAdministrator to store a Boolean value.


- Add another Initialize variable of Variables connector. Set the name as UserGroupInfo to store a Boolean value.
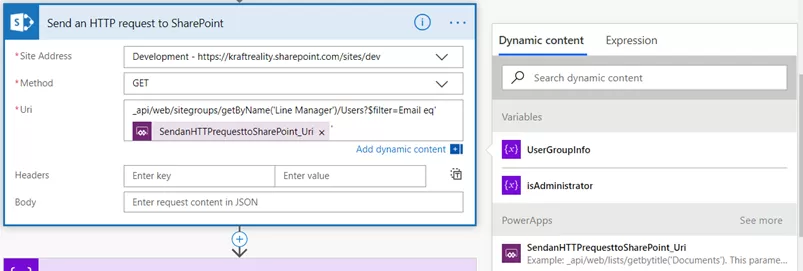
- Add an action, Send an HTTP request to SharePoint of SharePoint connector.
Site Address – Select the site address where the security group is created

Method – GET

Uri – api/web/sitegroups/getByName(‘SharePoint Group’)/Users?$filter=Email eq ‘’

Replace the SharePoint Group with the name of the group created in Step-1. Here I had created the group ‘Line Manager’.

Put the cursor pointer in between the single quotes and select the option from PowerApps, SendanHTTPrequesttoSharePoint_Uri from dynamic content window.
- Add an action, Set Variable of Variable connector. Select the variable UserGroupInfo in Name and value as Body from Send an HTTP request to SharePoint from dynamic content.

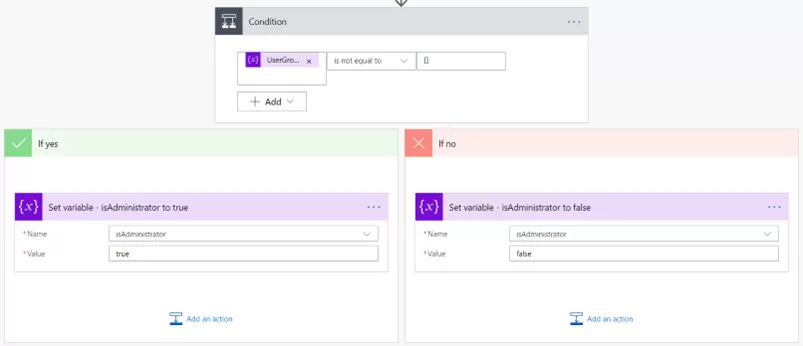
- Add an action, Condition of Control Connector. Set the conditional value as variable UserGroupInfo and select the condition is not equal to and in value to be compared as ‘[]’.
Inside the if yes and if no options,
For the option if yes, add an action Set Variable of Variable connector. Select the variable isAdministrator and set the value as true,
For option if no, add an action Set Variable of Variable connector. Select the variable isAdministrator and set the value as false.
- Add an action, Respond to PowerApps of PowerApps connector. Select the text option for the output. Set the variable as isAdminUser and the value as isAdministrator from the Dynamic content.

The final look of the flow would be like this:
Step-3
Implementing the Flow with PowerApps App
After the Flow is ready, lets configure the same with the App to test it.
On the first screen that would be visible when you run the App, on its OnVisible Property, set the variables as below:

First, we take the variable isAdmin and set it as false.
Secondly, we would check with the flow to set the variable UserGroupInfo as the flow’s outcome.
On the button’s visible property, set it as If(isAdmin, true). SO that if the user is in the SharePoint Group the button would be visible else it would not.
So when a user is inside the SharePoint Group, the screen would display the button:
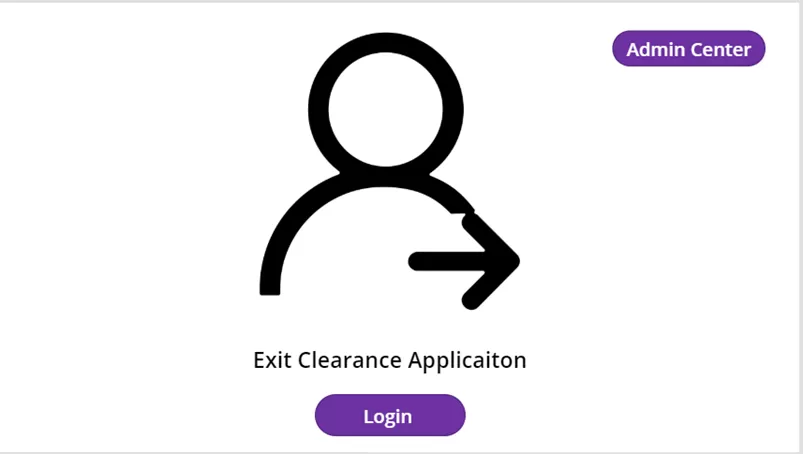
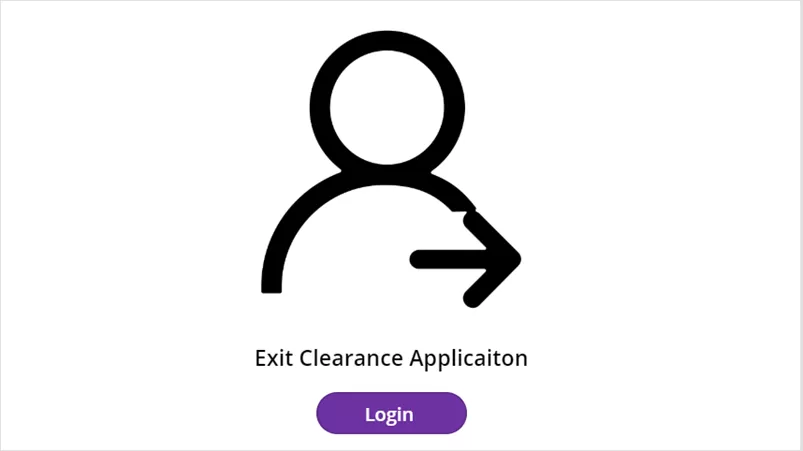
And when the user is not, we display:
In conclusion, leveraging PowerApps in conjunction with SharePoint groups provides a dynamic solution for implementing role-based access control within your applications — a strategy especially important if you’re working with sensitive content or planning to migrate file shares to SharePoint Online.
By utilizing the capabilities of Flow, we have demonstrated how to seamlessly manage user permissions, ensuring that only authorized individuals can access specific features or functionalities.
With Microsoft PowerApps solutions, organizations can not only enhance security measures but also streamline workflows and improve overall efficiency.
Whether it’s creating custom apps tailored to unique business requirements or integrating with existing systems for seamless collaboration, PowerApps empowers businesses to unlock the full potential of their digital ecosystems. And if you’re aiming to optimize internal collaboration, explore the top benefits of SharePoint Online to extend the value even further.
By following the steps outlined in this guide, you can effectively implement role-based security measures in your PowerApps applications, providing a tailored and secure user experience for your organization.
Incorporating Microsoft PowerApps solutions into your development toolkit opens a world of possibilities, enabling you to drive innovation, maximize productivity, and achieve your business objectives with confidence.
Please post your question, if you will find while implementing this process. Thank you.
Want to talk?
Drop us a line. We are here to answer your questions 24*7.


